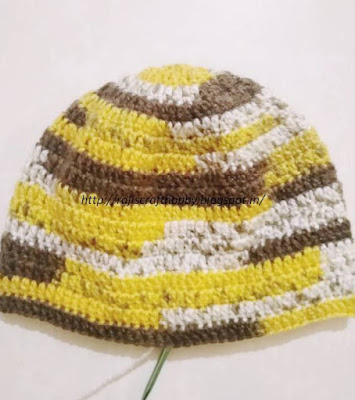
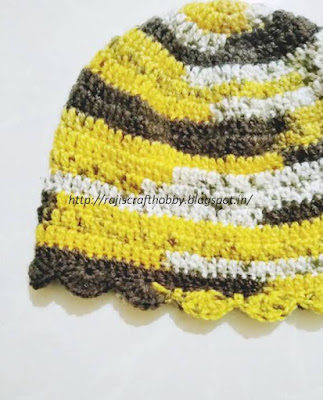
I love making simple beanies. Besides the fact that they are
so easy and quick to make, they are great for charity and gift projects. This hat
is just your standard, double crochet beanie hat.
I’ve added a shell stitch border to the cap. A crochet shell
edging, also often referred to as a scallop edging, is a very pretty
and easy to follow stitch which can give
a pretty finishing touch to your
project.
Materials Used:-
- 4 Ply Yarn
- 4 mm Crochet Hook
When I was learning to crochet hats, I used to start with the usual chain 6 and join method.Then I learnt the Magic Circle method and trust me after that I've never used usual chain 6 and join method.
A magic circle is a way to begin crochet in the round by crocheting over an adjustable loop and then pulling the loop tight. The advantage of the magic circle method unlike the regular chain 6 and join method, there is no hole left in the middle of your starting round.
Check out the tutorial for Magic Circle at Hearthookhome.
Start by making a Magic Circle.
Make 12 Double Crochet in the Circle.Slip stitch to the first double crochet and pull the loose end to close the gap.
Start the next round with a standing double crochet and make 2 Double Crochet in each stitch around.At end of this row you will have 24 stitches
I've already shared a tutorial to make a seamless crochet circle.Do Check out How to Crochet a Seamless Circle.
Start each round with a Standing Double Crochet.
Repeat 1DC, 2DC in all the stitches around.Slip Stitch to join.
You will have 36 stitches at end of this round.
Repeat 1DC, 1DC, 2DC all round.Slip Stitch to join.
You will have 48 stitches at the finish.
You will have 60 stitches at the finish
The Size of the hat depends and differs on the type of yarn, pattern and the tension of the stitch we use. Here I've stopped the increasing round at 60 Stitches.
Do visit The Crochet Crowd for a detailed explanation of Crochet Hat Sizes Reference Guide.
Now make 1 DC in all stitches around.Slip stitch at end to join.
Keep working 1 DC in each stitch till you reach the length required.
Remember to start each round with a Standing Double Crochet.
Start with a single crochet.
Skip the next 2 stitches, and make 7 double crochet in the 3rd stitch.
Skip 2 stitches and make a single crochet.
Repeat this pattern all around.
*single crochet, skip 2 stitches, 7 double crochet, skip 2 stitches*


Lovely! Very well-explained. I am trying my hand at crochet too. I made a beanie but for some reason I can't fathom, it looks like a prayer skull cap.
ReplyDeleteThank u .....😊
DeleteStitch countsssss????
Beautiful project!
ReplyDeleteThank u 😊
DeleteHey there! I've been following your weblog for a while noww and
ReplyDeletefinally gott the bravery to go ahead and give you a shout out from Houston Texas!
Just wanted to say keep up the excellent work!