

Who can resist cute animal designs ? They just look adorable on any Baby Crochet Project!!!
Here I am sharing a very easy Frog Baby Bib Pattern.
You might probably think its feasible to buy bibs for your baby at local store but, I am sure you would agree it's nice to have some special,handmade bibs.These would also be ideal for a baby shower gift for a friend or loved one and will surely be handy.As an added bonus, they are just easy to make, even for a beginner.
These bibs start off in the bottom section and work up.
Materials Used:-
- Yarn -Green,White and Black
- 4mm Crochet Hook
- Yarn Needle
Start with a slip knot and make 30 chain stitches.

Make 1 double crochet in the 2nd chain from the hook and continue with 1 double crochet in each of the remaining stitches.


Round 2:-
The next 3 rounds we will be increasing the width of the bib by making increasing stitches in the 1st and the last double crochet.
Start with 2 double crochet in the first stitch and 1 double crochet in rest of the stitches untill you reach the last stitch.Make 2 double crochet in the last stitch.
Chain 2 and turn.


This round is similar to round 2.
2 double crochet in the first stitch,1 double crochet in the remaining stitches and 2 double crochet in the last stitch.
Chain 2 and turn.


This would be the last increase round.
2 double crochet in the first stitch,1 double crochet in the remaining stitches and 2 double crochet in the last stitch.
Chain 2 and turn.

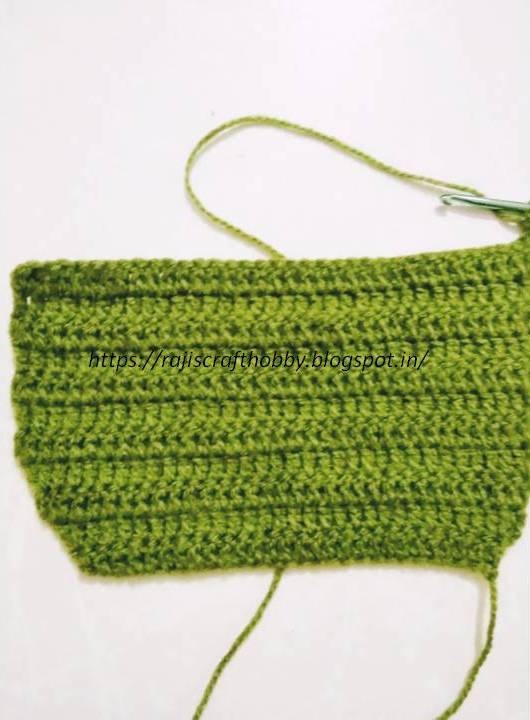
This round on wards we will be working on increasing the height of the bib.
Just work around 1 double crochet in each stitch.
Chain 1 and turn.
Repeat it untill you reach the height required.


Next 2 rounds we will be making decrease double crochet stitches.
Start the round with a Double crochet decrease, continue with 1 double crochet stitch in each of the following stitches and end the round with a double crochet decrease.
A double crochet decrease combines two double crochet stitches into one stitch. You will be making two partial double crochet stitches then combine them together into one stitch.
To make a decrease double crochet, yarn over and draw up a loop in. Yarn over and pull yarn through two loops on the hook. This is the first part of a double crochet stitch.
Instead of completing the double crochet, start making a second double crochet stitch.Yarn over and draw up a loop in the next stitch, then yarn over and pull yarn through two loops on the hook.
Yarn over and pull yarn through the remaining three loops on the hook.
Decrease is complete and this counts as one stitch.
Check out this Double Crochet Decrease tutorial by Annie's Craft.


Always remember that you make chain 2 and turn your work to start the next round.
For making the strands of the bib, make 1 double crochet in next 7 stitches.


Once you are left with 1 stitch, continue by making 25 chain stitches. Make 1 single crochet in the 2nd chain from the hook and continue with 1 single crochet in the remaining stitches.Slip stitch to end.

Repeat the same on the other side of the bib.


Eyes:-
Start by magic circle and Work 12 double crochet(DC) in the circle.Slip stitch to the first DC to finish the round.
Tug the loose thread to close the gap.


Mouth:-
With Red Color yarn, make 5 chain stitches.
Double crochet in the 2nd chain from the hook and 1 double crochet in the remaining stitches.


With a yarn needle sew in the eyes and the mouth and your Frog themed Baby Bib is ready !!!


.png)


It looks great! Thanks for the elaborate tutorial!
ReplyDeleteThank u @maya
DeleteThis bib is so very cute! I love that you used "safe for baby" crocheted accessories! Thank you for sharing!
ReplyDeleteThanku 😊😊
DeleteSo cute! Too bad my kids are too old for these now, otherwise I would be making lots of them!
ReplyDeleteThank you for sharing at The Really Crafty Link Party. Pinned.