

There are, of course, many different ways to crochet a circle.When you make the end of a crochet circle,there is always a bumpy seam and gap which is easily visible. However, there is a easy and simple basic way to make a circle without gaps .This will give you a flat Seamless Circle.
Start your circle with a magic circle.I prefer using magic circle over the normal chain 6 and join method.
Magic circle would not give you the hole gap that can be seen in the middle of a circle.
You can check out the tutorial to make a magic circle here.

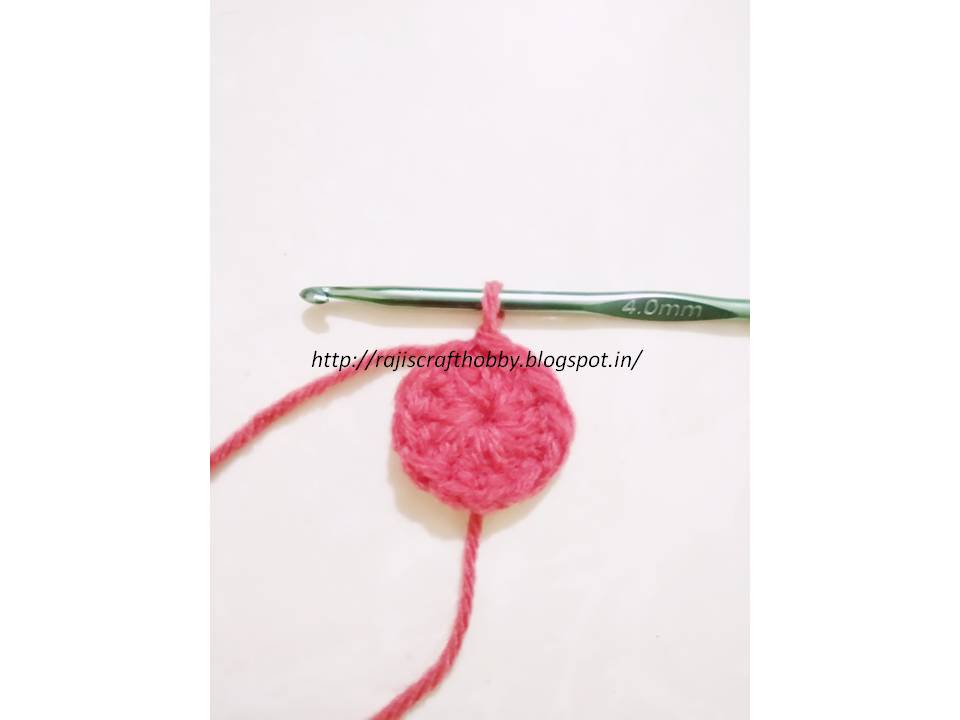
Make 12 Double crochet in the circle.


Now, here comes the trick to a seamless circle.Normally, you start a circle with chain three(which counts as a stitch), and continue with Double crochets in the following stitch.
So, instead of a chain three, start your round with a Standing Double Crochet.
Standing Double Crochet is nothing but to start your round with wrapping the yarn twice on the hook.
Check out the detailed tutorial on Standing double crochet by Tamara Kelly.
To Start a Standing Double Crochet pull your hook up, making a loop that’s about the same height as a Double Crochet would be, and put your finger on the loop to hold it down.
Holding down the loop to the hook, yarn over the hook with the loop itself.


Next, still holding on to the top of that loop with your finger, pull the working yarn underneath the loop.


Now, doesn't it look neater than the normal chain three and join method??


It looks a whole lot neater and prettier than the chain 3. Thank you for sharing.
ReplyDeletethank u @Minerva
DeleteGreat technique! Thank you!
ReplyDeletethank u!!!
Deletethis is great to know how to do i love it im going to try it ty vm
ReplyDeletethank u!!
Delete