The Basic Solid Granny Square coaster is another really simple design that can be used to make a set of coasters. You will love how easy and fast this coaster works up. I love making crocheted versions of household items and this would also make perfect handmade gift for your loved ones!!!
You can make them in holiday or seasonal colors as well.They are great for using up your scrap yarn.
The thing I absolutely love about this pattern is that unlike the classic Granny Square , this doesn't have any gaps between the stitches.
Materials Used:-
- 8 Ply Yarn
- 4mm Crochet Hook
Here is the Video Tutorial:-
Round 1:-
Start with a Magic Circle.
Chain 2.
This doesn't count as a stitch. This is just to bring the yarn to the same height.
12 Double Crochet in the circle.
Slip stitch on top of the first Double crochet. Pull the yarn end to close the circle.
Round 2:-
Start with a Standing Double Crochet. Check out the tutorial for Standing Double Crochet.
5 Double Crochet in the same stitch.
1 Double Crochet each in the next 2 stitches.
5 Double Crochet in the next stitch.
Repeat *(5DC,1DC,1DC)* in rest of the stitches.
Slip Stitch on top of the first Double Crochet to end the round.
Round 3:-
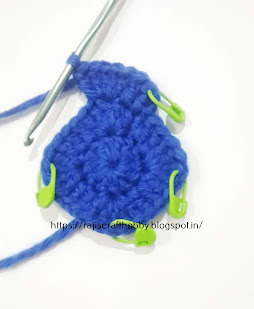
Before you start working, mark the corners with stitch markers. The 3rd stitch of the 5 Double Crochet group from the previous round is the center most stitch.
Start with a Standing Double Crochet.
1 Double Crochet in the same stitch.
1 Double Crochet in the next stitch.
You Should reach the corner now.
5 Double Crochet in the corner stitch.
1 Double Crochet each in the remaining stitches untill you reach the next corner.
5 Double Crochet in the corner stitch.
Repeat all around.
Slip stitch to end the round.
Round 4:-
This round is similar to the previous round.
Again, mark your corner stitches with stitch markers.Keeping track of the stitches is so much easier when you follow this method.
Start with a Standing Double Crochet.
1 Double Crochet in each of the stitch untill you reach the corner.
5 Double crochet in the corner stitch.
Repeat all around.
Slip stitch to end the round.
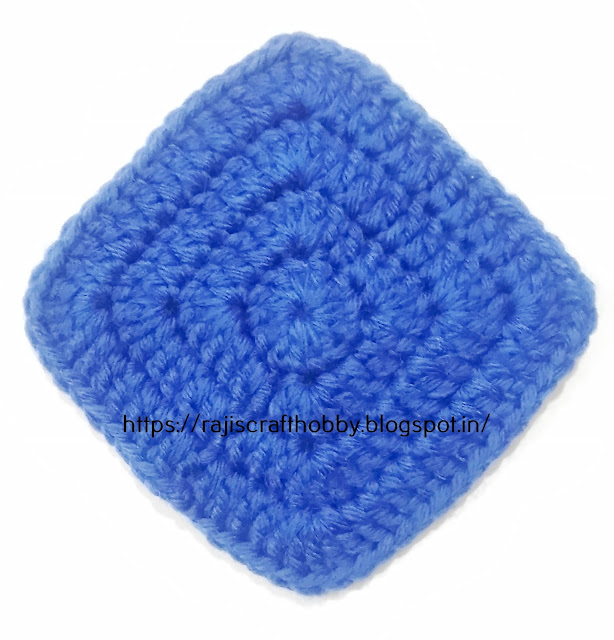
Your coaster is ready to be used.
You can continue the same pattern and make it bigger to make a Table Mat or even a Blanket.
See....there are no visible gaps!!!!!
Here is the Summary of the Pattern:-
Round 1:-
Start with a Magic Circle.
Chain 2.
This doesn't count as a St.This is just to bring the yarn to the same height.
12 DC in the circle.
SL on top of the first DC. Pull the yarn end to close the circle.
Round 2:-
Start with a Standing DC. Check out the tutorial for Standing DC.
5 DC in the same St.
1 DC each in the next 2 Sts.
5 DC in the next St.
Repeat *(5DC,1DC,1DC)* in rest of the Sts.
SL on top of the first DC to end the round.
Round 3:-
Before you start working, mark the corners with St markers. The 3rd St of the 5 DC group from the previous round is the center most St.
Start with a Standing DC.
1 DC in the same St.
1 DC in the next St.
You Should reach the corner now.
5 DC in the corner St.
1 DC each in the remaining Sts untill you reach the next corner.
5 DC in the corner St.
Repeat all around.
SL to end the round.
Round 4:-
This round is similar to the previous round.
Again, mark your corner Sts with St markers.Keeping track of the Sts is so much easier when you follow this method.
Start with a Standing DC.
1 DC in each of the St untill you reach the corner.
5 DC in the corner St.
Repeat all around.
SL to end the round.
Your coaster is ready to be used.
You can continue the same pattern and make it bigger to make a Table Mat or even a Blanket.
******


I really like this granny coaster you gave the directions for. I will use it as a baby blankrt. Thanks,
ReplyDeleteThese squares would be perfect for a warm winter blanket. Thank you for sharing the tutorial at The Really Crafty Link Party. Pinned.
ReplyDeletethanku :)
DeleteThank you! Very easy to understand instructions. Using this method to border a double crochet blanket.
ReplyDeleteThank You so much 😊😊
DeleteThank you for sharing you pattern. These squares look great. My only problem is the way my stitches increase, isn't always the same. I've made mistakes, and would have greater success if there was something saying how many stitches you finished with at the end of each round. I get to the 2nd round and have 28dc, but then in the 3rd round I get 42? Not sure where I messed up.
DeleteThanks.
Thank you so much 😊😊😊
Deletethis tutorial was posted long back.... I missed out on giving the stitch counts.....!!
I guess you have missed out few stitches......
...... here...giving the details below..... hope this helps.....
the stitch count with each round should increase by 16.
Round 1 -12 sts
Round 2 - 28 sts
Round 3 - 44 sts
Round 4 - 60 sts
Round 5 - 76 sts..... and so on!!
nice
ReplyDeleteThank you so much 😊
Delete