

When it comes to decorating your home and Christmas tree, adding a bit of your handmade crochet ornaments makes it even more fabulous cheerful. Making your own Crochet Ornaments will instantly put you in the festive mood.
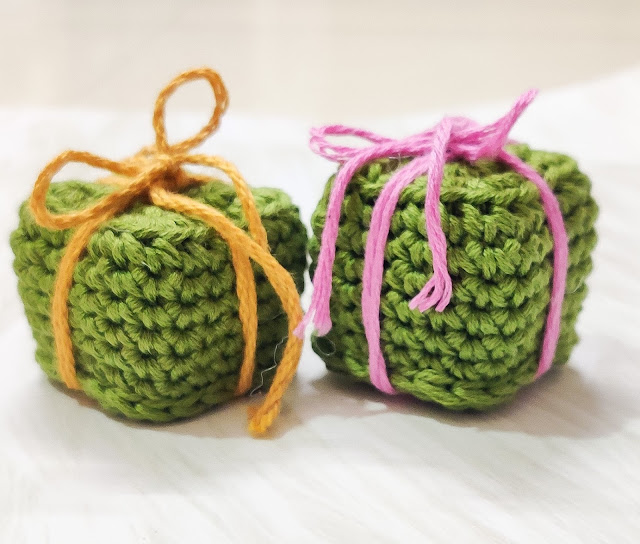
Today am sharing the pattern for this cute DIY Crochet Gift Box Ornaments. The Gift Box Ornament is made with simple amigurumi cube pattern and stuffed with fiberfill to give shape and volume. With simple crochet stitches the pattern is quite easy and its works up pretty quick.
This is a cute handmade little crocheted gift ornament which will look very pretty on your tree. You can also use these ornaments as Christmas gift toppers or just join them together to make holiday themed garlands or buntings.
Materials Used:-
- 4 Ply Cotton Knitting Yarn
- 4 mm Crochet Hook
- Fiber Fill
Size:-
1 Inch
Notes:-
For this whole pattern, the starting Chain 1 is not counted as a stitch. It is just to bring the yarn to a working height.
AD-FREE, PRINTER-FRIENDLY PDF PATTERN:
The written pattern and photo tutorial is given below along with a free video tutorial. This pattern is also available as an ad-free, printer-friendly pdf pattern that can be purchased on Ravelry. Please click the link below to purchase the PDF Pattern.
Here is the Video Tutorial:-
Pin it and Save for Later:-
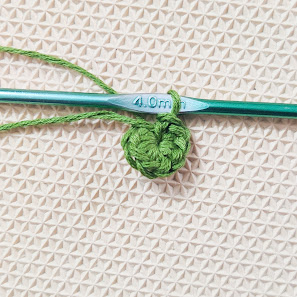
Round 1:-
Start with a Magic Circle.
Chain 1(Not Counted as a stitch)
8 single Crochets.
Pull the yarn end to close the gap.
Slip stitch on top of the first Single Crochet.


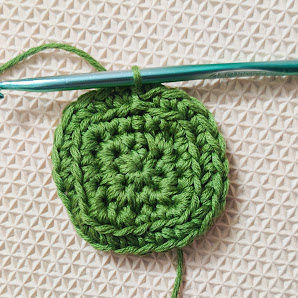
Chain 1.1 Single Crochet in the same stitch.
3 Single Crochets in the next stitch.(Mark the middle stitch with a stitch marker(i.e. the Second Stitch of the 3 Single Crochets)This will form the corner of the square.)
1 Single Crochet in the next stitch.
3 Single Crochets in the next stitch.( Mark the middle stitch)
Repeat*(1 SC, 3SC) in rest of the stitches.
Slip Stitch on top of the first Single Crochet.


Chain 1. 1 Single Crochet in the same stitch.
1 Single Crochet in each stitch untill the Marked stitch.(Corner)
3 Single Crochets in the Marked stitch.
Repeat* (1SC in each stitch untill the Marked Stitch, 3 SC in the Marked stitch)
Slip Stitch on top of the first single Crochet.


With the same Pattern make one more piece for the top of the cube and keep it aside.

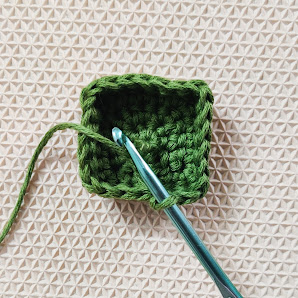
Chain 1.
1 Backloop Single Crochet in each stitch around.
This will form the turning base for the cube.
Slip stitch on top of the first Single Crochet to end the round.
Make the slip stitch in both the loops.


Chain 1.
1 Single Crochet in each stitch.
Slip stitch on top of the first Single Crochet.


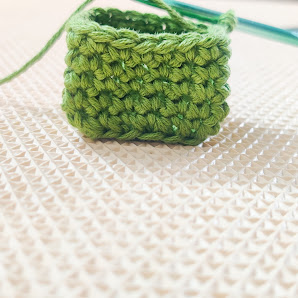

Take the top of the cube made earlier and place it on top and mark the corner stitches with Stitch Markers.
This will make it easier to cast the joining stitches.
Join both the pieces with Slip Stitches.
Once you have a small opening left, fill it up with fiberfill.
Continue with slip stitches to close the opening and weave off.


Use a long piece of yarn and wrap it around the cube to make the hanging loop.


Round 1:-
Start with a Magic Circle.
Ch 1(Not Counted as a St)
8 SCs.
Pull the yarn end to close the gap.
SL on top of the first SC.
Round 2:-
Ch 1.1 SC in the same St.
3 SCs in the next St.(Mark the middle St with a St marker(i.e. the Second St of the 3 SCs)This will form the corner of the square.)
1 SC in the next St.
3 SCs in the next St.( Mark the middle St)
Repeat*(1 SC, 3SC) in rest of the Sts.
SL on top of the first SC.
Round 3:-
Ch 1. 1 SC in the same St.
1 SC in each St untill the Marked St.(Corner)
3 SCs in the Marked St.
Repeat* (1SC in each St untill the Marked St, 3 SC in the Marked St)
SL on top of the first SC.
With the same Pattern make one more piece for the top of the cube and keep it aside.
Round 4:-
Ch 1.
1 Backloop SC in each St around.
This will form the turning base for the cube.
SL on top of the first SC to end the round.
Make the SL in both the loops.
Round 5 to 9:-
Ch 1.
1 SC in each St.
SL on top of the first SC.
Joining and Stuffing:-
Take the top of the cube made earlier and place it on top and mark the corner Sts with St Markers.
This will make it easier to cast the joining Sts.
Join both the pieces with SLs.
Once you have a small opening left, fill it up with fiberfill.
Continue with SLs to close the opening and weave off.
Hanging Loop:-
Use a long piece of yarn and wrap it around the cube to make the hanging loop.
******


Thank-you! I was looking for a quick little ornament to make for Christmas gifts. This is perfect
ReplyDeleteZuzanna in northern Canada
Thank You so much 😊
Delete