
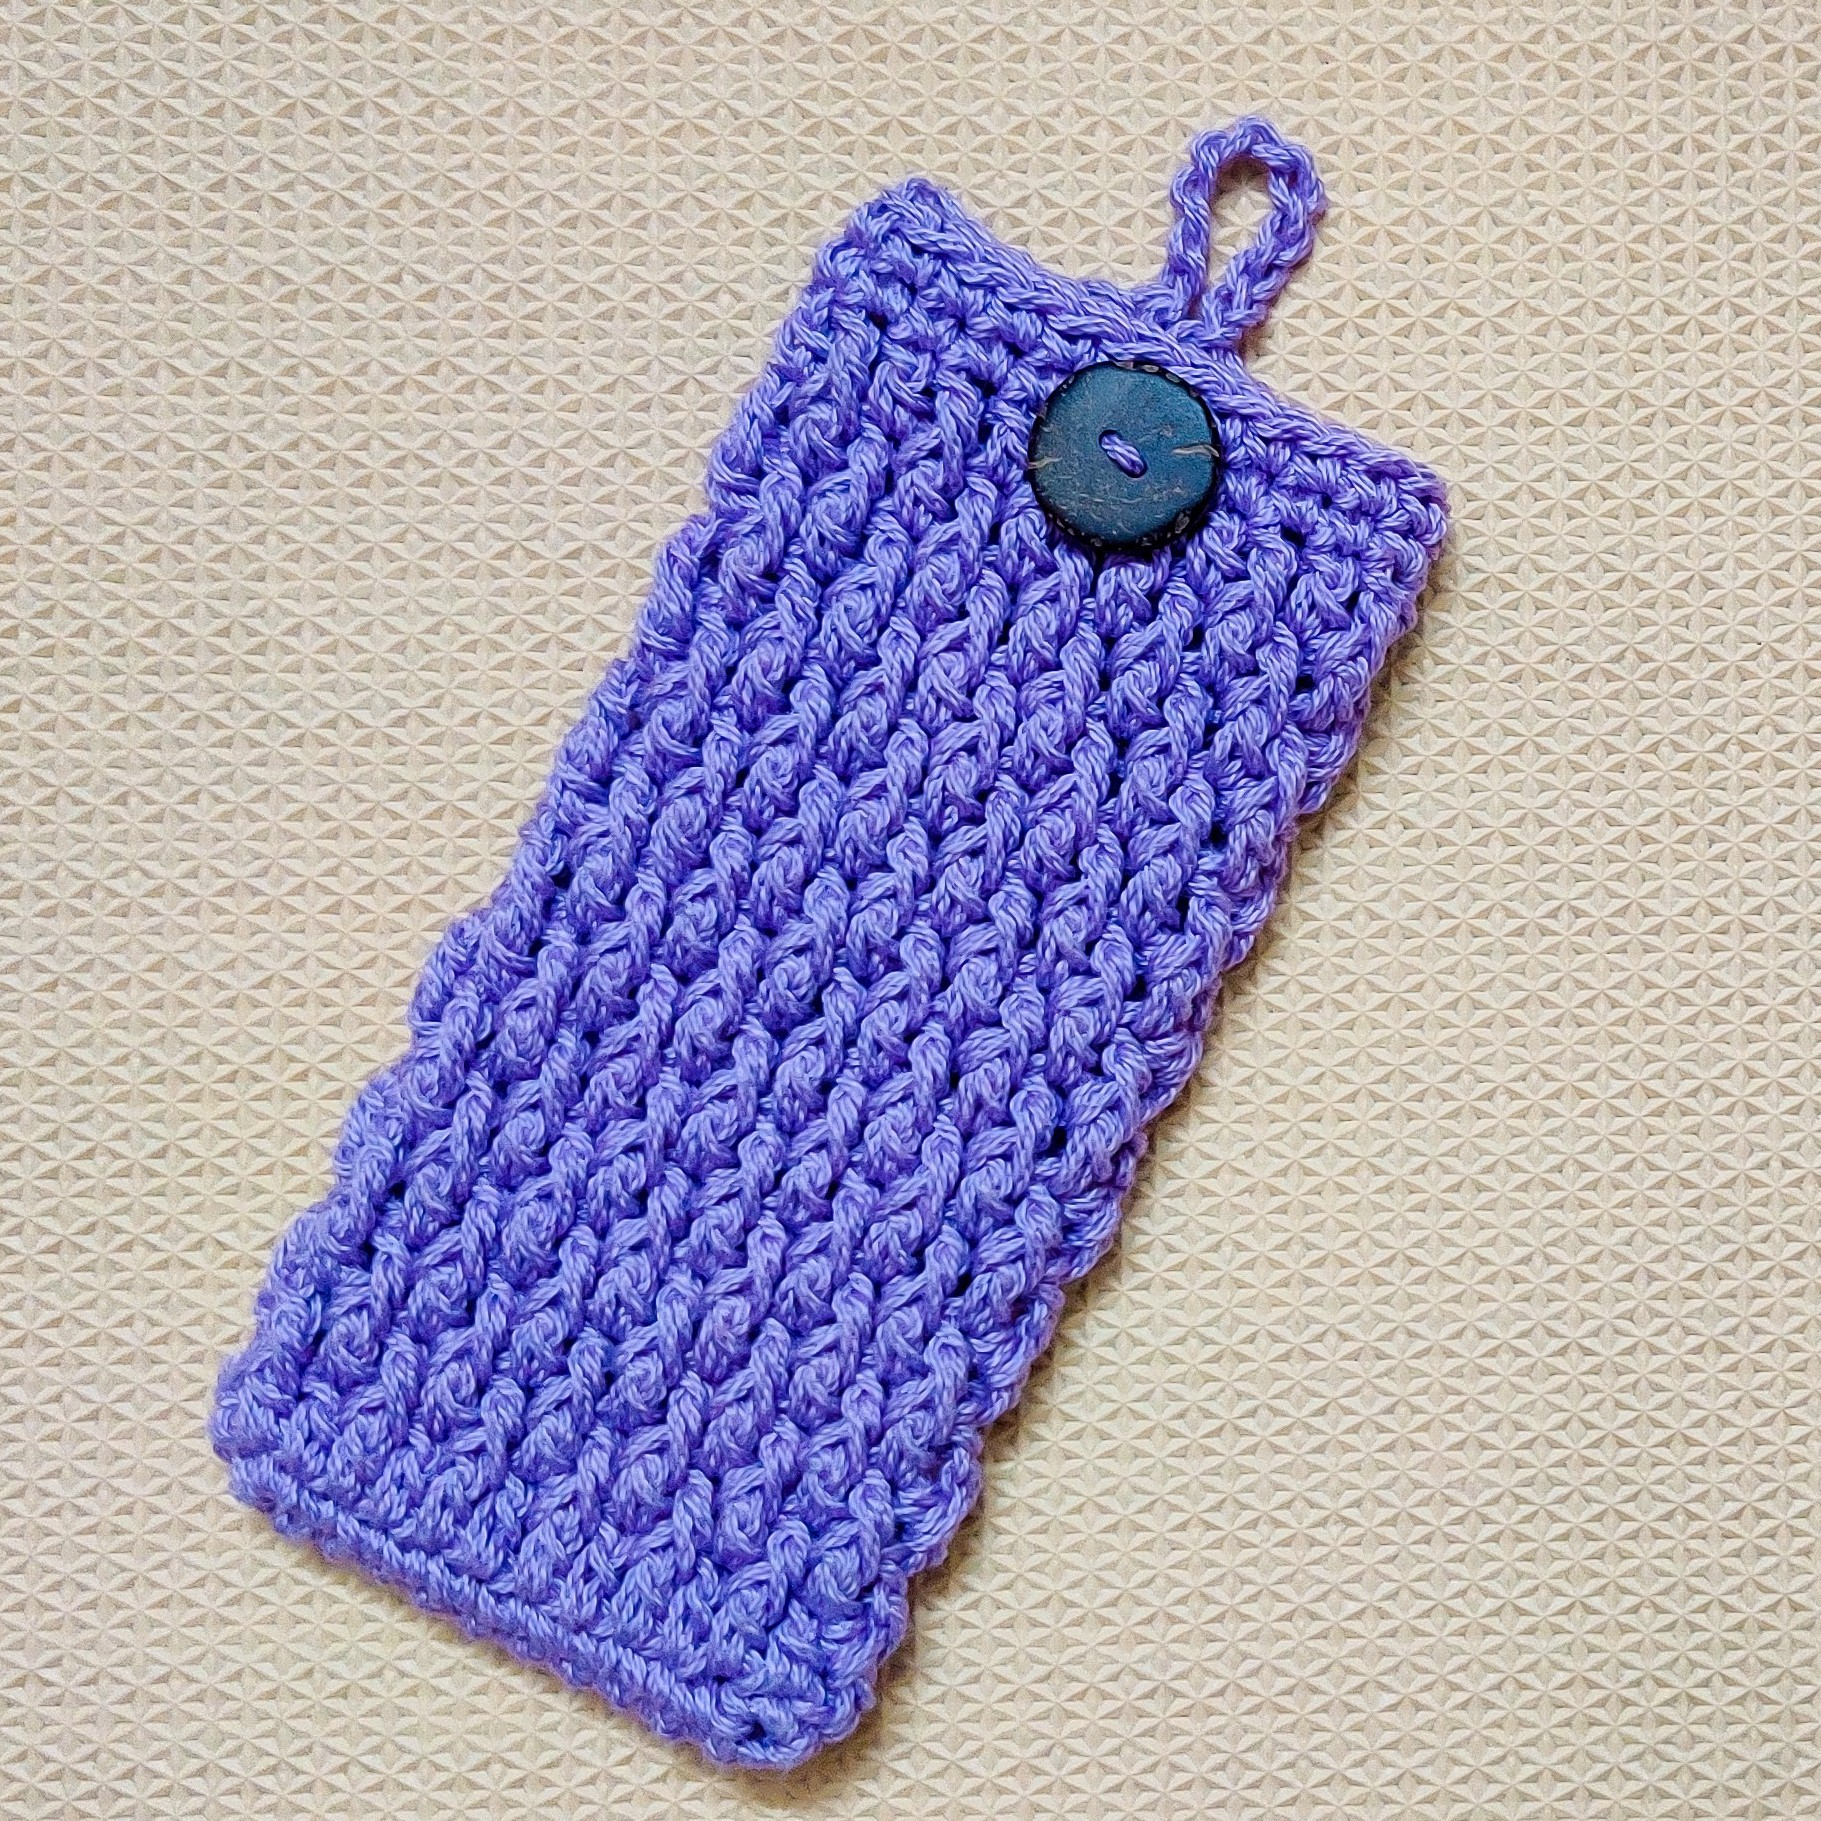
Crochet Organizers like Crochet Bags Pouches and Crochet Mobile Covers are great and they sure do come handy to carry and protect your electronic gadgets. It’s always exciting and fun to make your own crochet accessories. The best thing about making a crochet organizers is that they are completely versatile and you can customize them to any size shape or color of your liking.
Today am sharing the pattern for this Simple and Easy Crochet Mobile Cover. These are made with simple Double Crochets and Front Post Double Crochets worked alternatively which gives the lovely textured look. This is a very simple and quick pattern that can be adapted to all kinds of phones. These are fairly quick to make. This would make a great project to use up those leftover yarn and they would also make lovely gifts to your loved ones.
Materials Used:-
- 4 Ply Cotton Knitting Yarn
- 4 mm Crochet Hook
Size:-
Customizable to any size
Notes:-
For this whole pattern, the starting chain 2 is not counted as a stitch. This is just to bring the yarn to a working height.
Start the Double Crochet in the same stitch.
For this whole pattern, the starting chain 2 is not counted as a stitch. This is just to bring the yarn to a working height.
Start the Double Crochet in the same stitch.
Here is the Video Tutorial:-
You can follow along with this tutorial video. Please be sure to subscribe too!
PIN it and Save for Later:-

Round 1:-
Start with a slip knot.
Chain 12.
You can change these starting number of chains according to the size of your gadget.


1 Single Crochet in the 2nd chain from the hook.
1 Single Crochet each in the remaining stitches untill the last stitch.
3 Single Crochets in the last stitch.
Turn your work and start working on the opposite side.
1 Single Crochet each in the remaining stitches untill the last stitch.
3 Single Crochets in the last stitch.
Slip stitch on top of the 1st Single Crochet.


Chain 2.
1 Double Crochet in each of the stitches.
Slip stitch on top off the first Double Crochet.


Chain 2.
1 Double Crochet
1 Front Post Double Crochet.
Repeat(1DC, 1FPDC).
Slip stitch on top of the first Double Crochet.


- This round onwards the starting stitch will be the alternate of the previous round.
- If the stitch in the previous round is a Double Crochet, then make a Front Post Double Crochet , if it’s a Front Post Double Crochet, then make a Back Post Double Crochet.
The pattern for this round will be:-
Chain 2.
1 Front Post Double Crochet.
1 Double Crochet in the next stitch.
Repeat(1FPDC, DC)
Slip stitch on top of the first Front Post Double Crochet.


Keep repeating Round 5 untill the size needed.


Chain 1(Not counted as a stitch).Start the next stitch in the same stitch.
1 Single Crochet in each stitch around.
Slip stitch on top of the first Single Crochet.


Chain 1(Not counted as a stitch).Start the next stitch in the same stitch.
1 Single Crochet in each stitch untill you reach the mid point.
Fold the cover in half to gauge the mid point.
Chain 10 and 1 Single Crochet in the same stitch.
This will make the button loop. You can change these stitches according to the size of the button you are using.
1 Single Crochet each in the remaining stitches.
Slip stitch on top of the first Single Crochet and weave off.
Using the yarn needle, sew the button on the opposite side of the Button Loop.


Here is the Summary of the Pattern:-
Round 1:-
Start with a slip knot.
Ch 12.
You can change these starting number of Chs according to the size of your gadget.
Round 2:-
1 SC in the 2nd Ch from the hook.
1 SC each in the remaining stitches untill the last stitch.
3 SCs in the last stitch.
Turn your work and start working on the opposite side.
1 SC each in the remaining stitches untill the last stitch.
3 SCs in the last stitch.
SL on top of the 1st SC.
Round 3:-
Ch 2.
1 DC in each of the stitches.
SL on top off the first DC.
Round 4:-
Ch 2.
1 DC
1 FP DC.
Repeat(1DC, 1FPDC).
SL on top of the first DC.
Round 5:-
This round onwards the starting stitch will be the alternate of the previous round.
If the stitch in the previous round is a DC, then make a FP DC , if it’s a FP DC, then make a Back Post DC.
The pattern for this round will be:-
Ch 2.
1 FP DC.
1 DC in the next stitch.
Repeat(1FPDC, DC)
SL on top of the first FP DC.
Round 6 Onwards:-
Keep repeating Round 5 untill the size needed.
Border:-
Ch 1(Not counted as a stitch).Start the next stitch in the same stitch.
1 SC in each stitch around.
SL on top of the first SC.
Button Loop:-
Ch 1(Not counted as a stitch).Start the next stitch in the same stitch.
1 SC in each stitch untill you reach the mid point.
Fold the cover in half to gauge the mid point.
Ch 10 and 1 SC in the same stitch.
This will make the button loop. You can change these stitches according to the size of the button you are using.
1 SC each in the remaining stitches.
SL on top of the first SC and weave off.
Using the yarn needle, sew the button on the opposite side of the Button Loop.
*********
.png)


thank you raji, i love your patterns i have made a few thank you again
ReplyDeleteThank you 😊😊
Delete