

Crochet Placemats are the best way to decorate and to a touch of personality to your home decor. Placemats are very versatile. You have a choice to make them in any shape you wish. They are both decorative and functional and they also make beautiful gifts for your loved ones, be it any occasion. You can color code them and make them according to the holiday season. By using different combination and variety of Crochet Stitches, you can give them a lovely textured look.
Add a touch and elegance and ambiance to your home decor with this Simple Crochet Round Placemat. The pattern is very easy and quick to whip up. You can make these easy placemats in no time at all for gift giving or to dress up your own table.
Materials Used:-
4 Ply Cotton Knitting Yarn
4 mm Crochet Hook
Size:-
12 inches - Customizable to any size
Notes:-
For this whole Pattern, the Starting Chain 2 is not counted as a stitch. It is just to bring the yarn to a working height. Start the next stitch in the same stitch.
For this whole Pattern, the Starting Chain 2 is not counted as a stitch. It is just to bring the yarn to a working height. Start the next stitch in the same stitch.
AD-FREE, PRINTER-FRIENDLY PDF PATTERN:
The written pattern and photo tutorial is given below along with a free video tutorial. This pattern is also available as an ad-free, printer-friendly pdf pattern that can be purchased on Ravelry . Please click the link below to purchase the PDF Pattern.
Here is the Video Tutorial:-
You can follow along with this tutorial video. Please be sure to subscribe too!
PIN it and Save for Later:-

Let's Start...!!!
Round 1:-
Start with a Magic Circle.
Chain 4 (the starting chain 2 will be considered as 1 Double Crochet and the remaining stitches will be counted as Chain 2.)
1 Double Crochet.
Chain 2
Repeat(1DC, Chain 2) untill you have 12 Chain spaces.
Pull the yarn end to close the gap.
Slip Stitch into the Second Chain.


Chain 2.
1 Double Crochet in the same stitch.
1 Double Crochet in the next chain space.
Repeat(1DC,1DC(in the chain space))
Slip stitch on top of the first Double Crochet.


Chain 2.
1 Double Crochet in the same stitch.
2 Double Crochets in the next stitch.
Repeat(1DC,2DC)
Slip stitch on top of the first Double Crochet.
36 Stitches.


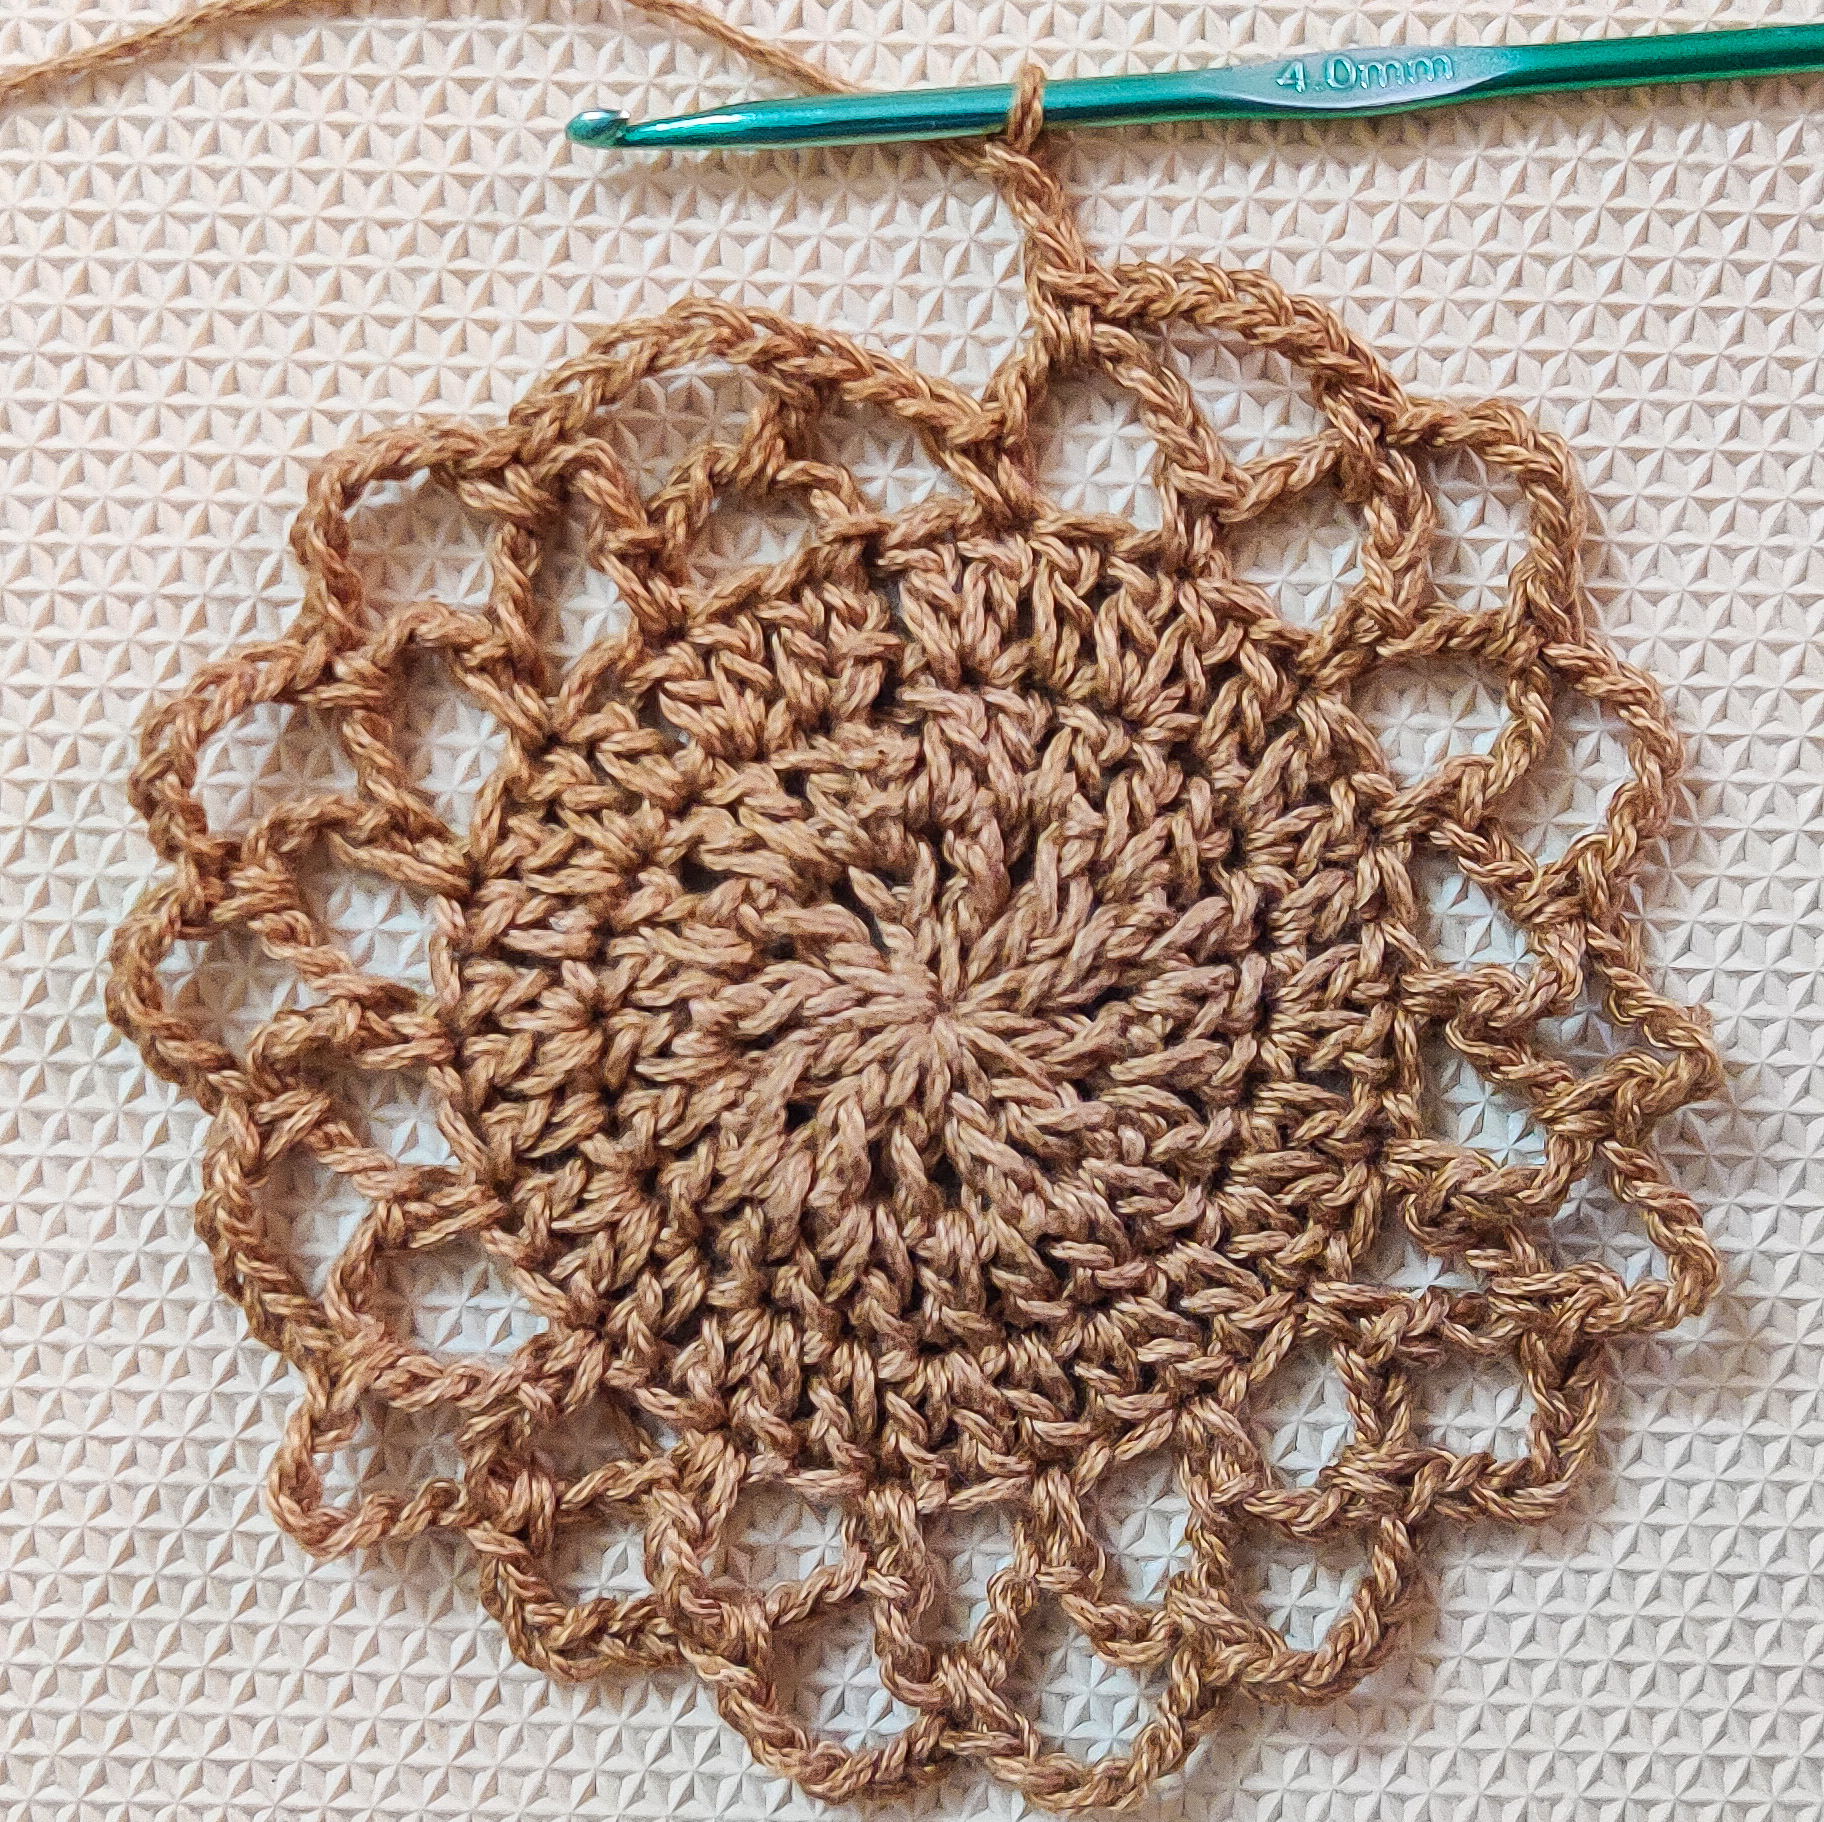
Chain 5.
Skip 1 Stitch
1 Single Crochet in the next stitch.
Repeat*(Chain 5, Skip 1, 1 SC)
Once you reach the end, Chain 2 and 1 Double Crochet into the first Chain space. (This is the connecting increase stitch)
1 Single Crochet in the next stitch.
Repeat*(Chain 5, Skip 1, 1 SC)
Once you reach the end, Chain 2 and 1 Double Crochet into the first Chain space. (This is the connecting increase stitch)


Chain 5.
I Single Crochet in the next chain space.
Repeat*(Chain 5, 1SC).
I Single Crochet in the next chain space.
Repeat*(Chain 5, 1SC).
Once you reach the end , Chain 2, and 1 Double Crochet on the Double Crochet from the previous round.(This is the connecting increase stitch).


Repeat Round 5.
To end Round 7, Chain 5 and make a Slip stitch on the starting Double Crochet.
If you wish to make your Placemat bigger, you can keep repeating Round 5 untill you reach the size needed.


Slip stitch into the chain space.
Chain 2.
7 Double Crochets in the chain space.
Repeat((7 DC ) in of the Chain spaces)
Slip stitch on top of the first Double Crochet.


Chain 4 (the starting chain 2 will be considered as 1 Double Crochet and the remaining stitches will be counted as Chain 2.)
Skip 1 Stitch.
1 Double Crochet in the next stitch.
Chain 2
Repeat(1DC, Chain 2, Skip 1)
Slip Stitch into the Second Chain.


Chain 2.
1 Front Post Double Crochet in the same stitch.
1 Double Crochet in the next chain space.
Repeat(1 FPDC,1 DC(in the next Chain Space))
Slip stitch on top of the first Front Post Double Crochet.


Chain 1,
(1 Single Crochet, 1 Double Crochet, Chain 2, 1 Double Crochet, 1 Single Crochet) - all in the same stitch.
Skip 1 Stitch.
Repeat((1SC, 1DC, Ch2, 1DC, 1SC)- all in same stitch, Skip 1 stitch)
Slip stitch on top of the fist stitch and weave off.


Here is the Summary of the Pattern:-
Round 1:-
Start with a Magic Circle.
Ch 4 (the starting Ch 2 will be considered as 1 DC and the remaining Sts will be counted as Ch 2.)
1 DC.
Ch 2
Repeat(1DC, Ch 2) untill you have 12 Ch spaces.
Pull the yarn end to close the gap.
SL St into the Second Ch.
Round 2:-
Ch 2.
1 DC in the same St.
1 DC in the next Ch space.
Repeat(1DC,1DC(in the Ch space))
SL St on top of the first DC.
Round 3:-
Ch 2.
1 DC in the same St.
2 DCs in the next St.
Repeat(1DC,2DC)
SL St on top of the first DC.
36 Sts.
Round 4:-
Ch 5.
Skip 1 St
1 SC in the next St.
Repeat*(Ch 5, Skip 1, 1 SC)
Once you reach the end, Ch 2 and 1 DC into the first Ch space. (This is the connecting increase St)
Round 5:-
Ch 5.
I SC in the next Ch space.
Repeat*(Ch 5, 1SC).
Once you reach the end , Ch 2, and 1 DC on the DC from the previous round.(This is the connecting increase St).
Round 6 and Round 7:-
Repeat Round 5.
To end Round 7, Ch 5 and make a SL St on the starting DC.
If you wish to make your Placemat bigger, you can keep repeating Round 5 untill you reach the size needed.
Round 8:-
SL St into the Ch space.
Ch 2.
7 DCs in the Ch space.
Repeat((7 DC ) in of the Ch spaces)
SL St on top of the first DC.
Round 9:-
Ch 4 (the starting Ch 2 will be considered as 1 DC and the remaining Sts will be counted as Ch 2.)
Skip 1 St.
1 DC in the next St.
Ch 2
Repeat(1DC, Ch 2, Skip 1)
SL St into the Second Ch.
Round 10:-
Ch 2.
1 FPDC in the same St.
1 DC in the next Ch space.
Repeat(1 FPDC,1 DC(in the next Ch Space))
SL St on top of the first FPDC.
Border:-
Ch 1,
(1 SC, 1 DC, Ch 2, 1 DC, 1 SC) - all in the same St.
Skip 1 St.
Repeat((1SC, 1DC, Ch2, 1DC, 1SC)- all in same St, Skip 1 St)
SL St on top of the fist St and weave off.
********
.png)


What is the overall diameter/size of the placemat?
ReplyDelete12 inches
Delete