
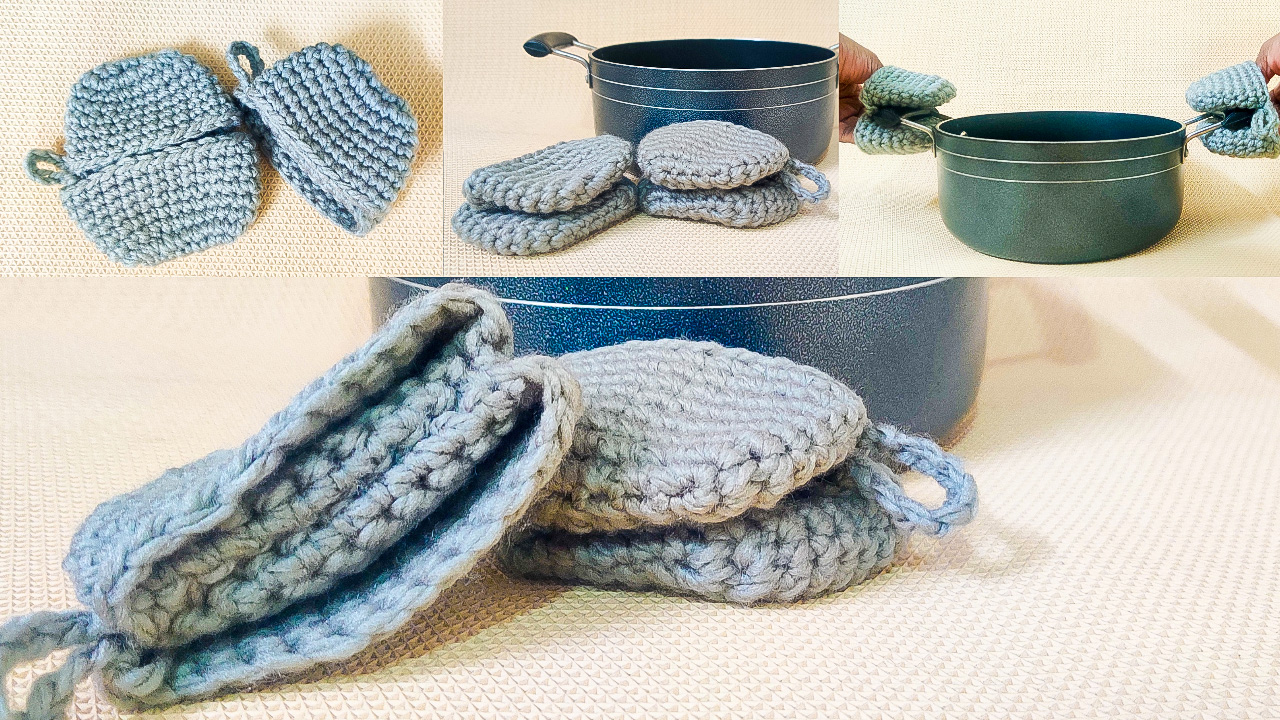
Crocheted Potholders are one of the basic essential accessory to have in your kitchen. They help you hold hot dishes and keep your hands safe. There are many pattern varieties and shapes of Potholder which you can crochet up .Often these Crochet potholders are quick and easy to make. You can easily make one in no time at all.
Here is a simple pattern for Crochet Potholder Pinch Mitts. These Pinch mitts are different in shape from the usual Potholder Patterns which are round , square or rectangle in shape. You can use these pinch mitts to grab and hold the handles of the cooking pots. These pinch mitts fits and will over your fingers. You can use bulky and thick yarns to make them easy to use. These would also make great housewarming or holiday gifts.
Materials Used:-
10 Ply Yarn
6 mm Crochet Hook
AD-FREE, PRINTER-FRIENDLY PDF PATTERN:
The written pattern and photo tutorial is given below along with a free video tutorial. This pattern is also available as an ad-free, printer-friendly pdf pattern that can be purchased on Ravelry. Please click the link below to purchase the PDF Pattern.
Here is the Video Tutorial:-
You can follow along with this tutorial video. Please be sure to subscribe too!
PIN it and Save for Later:-

Let's Start...!!!
Part 1:-
Round 1:-
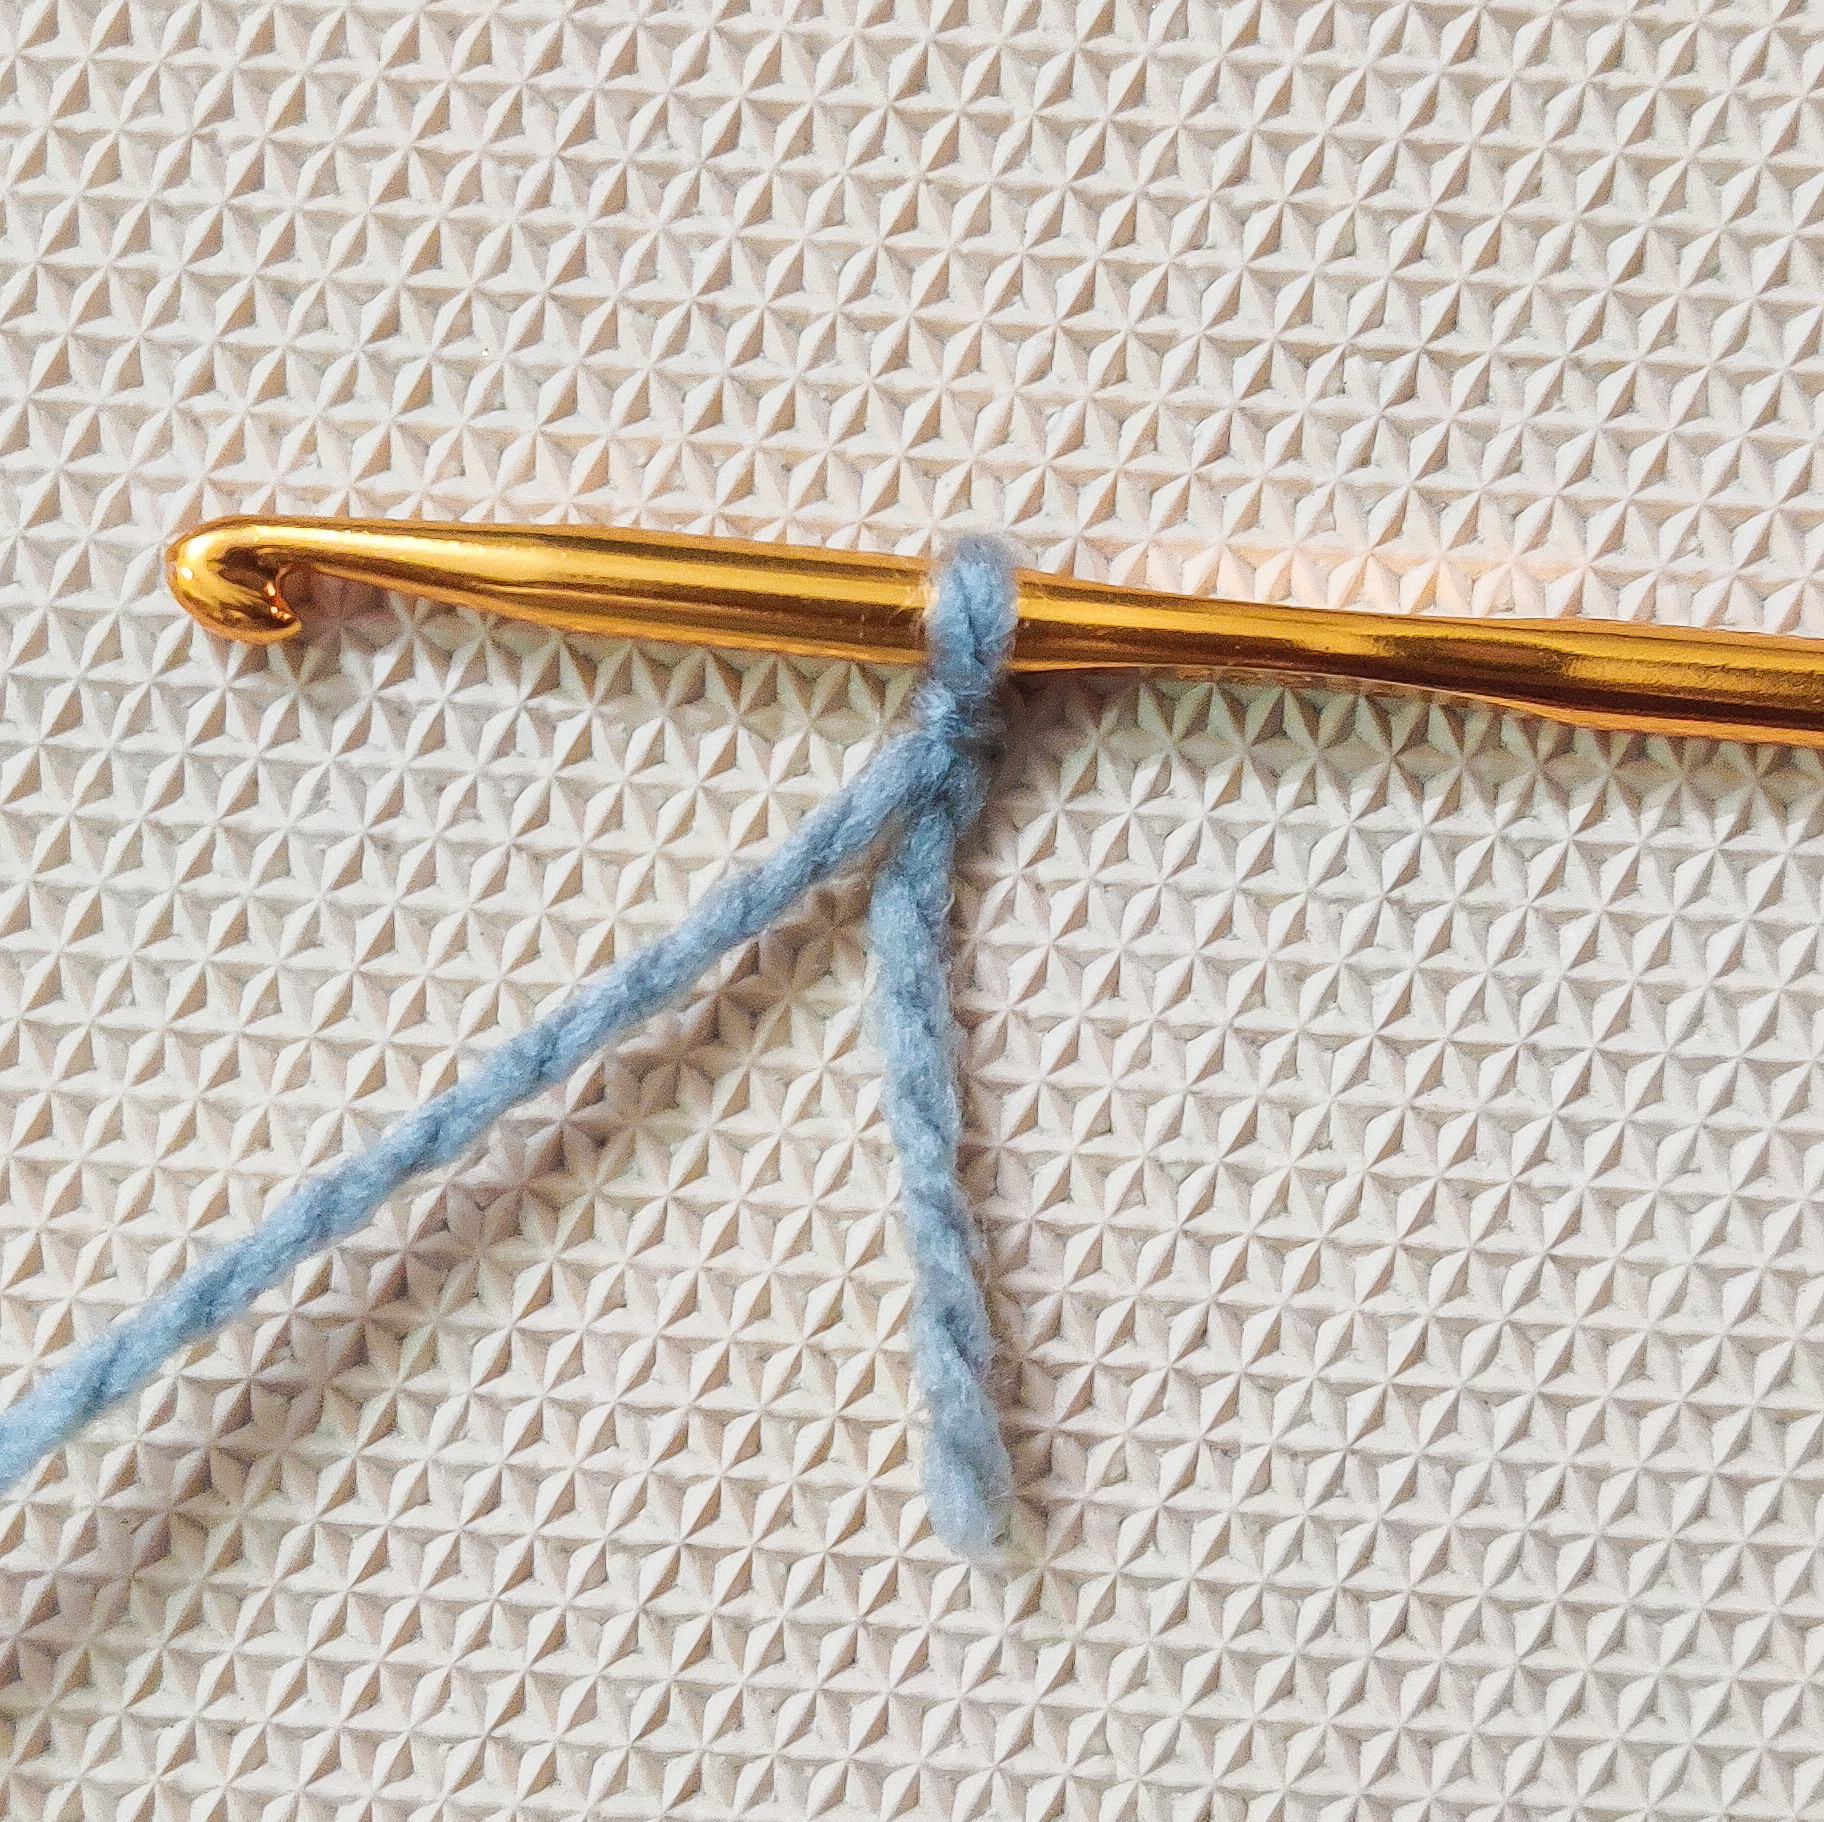
Start with a slip knot.
Chain 6.
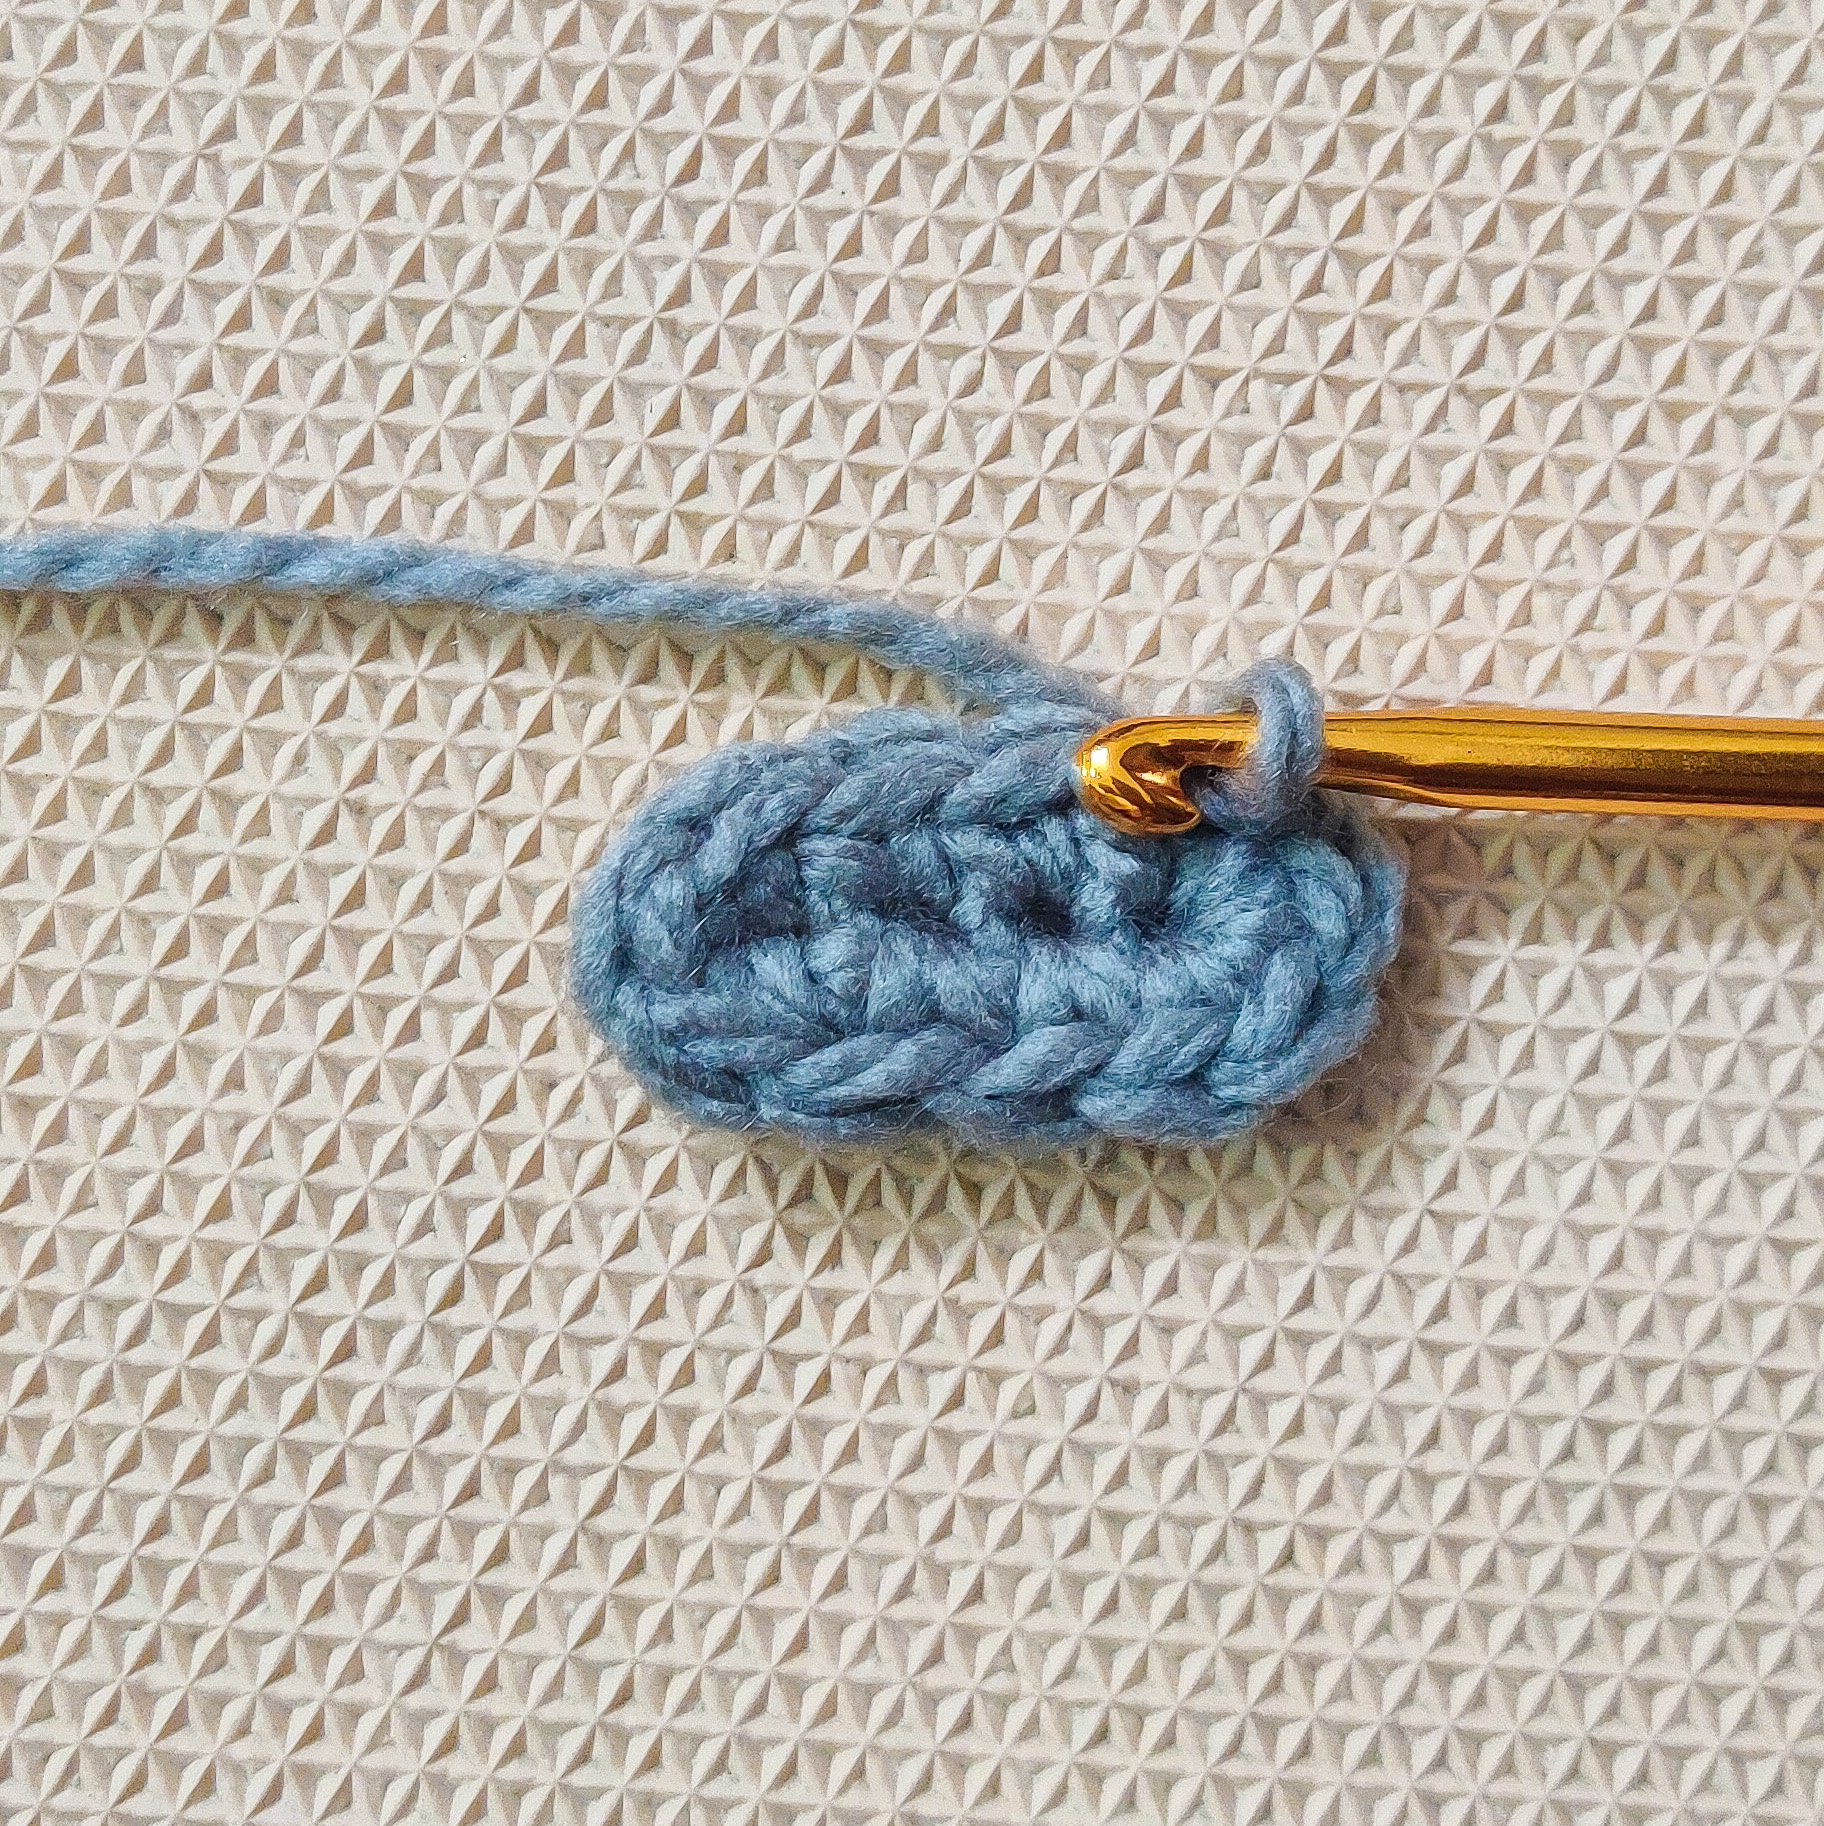
1 Single Crochet in the 2nd chain from the hook.
1 Single Crochet each in the remaining stitches untill the last stitch.
3 Single Crochets in the last stitch.
Turn your work and start working on the opposite side.
1 Single Crochet each in the remaining stitches untill the last stitch.
3 Single Crochets in the last stitch.
Slip stitch on top of the 1st Single Crochet.


Round 2:-
Chain 1(Not Counted as a stitch. Start the next stitch in the same stitch)
2 Single Crochets in each stitch around.
Slip stitch on top of the first Single Crochet.


Round 3:-
Chain 1(Not Counted as a stitch. Start the next stitch in the same stitch)
1 Single Crochet in each stitch around.
Do not make a slip stitch at the end. We will be working in continuous rounds.


Round 4 to Round 8:-
1 Single Crochet in each stitch around.
Remember to work in continuous rounds.
At the end of Round 8 , make a slip stitch on top of the first Single Crochet and weave off.


Part 2:-
Round 1:-
Start with a slip knot.
Chain 5.
1 Single Crochet in the 2nd chain from the hook.
1 Single Crochet each in the remaining stitches untill the last stitch.
3 Single Crochets in the last stitch.
Turn your work and start working on the opposite side.
1 Single Crochet each in the remaining stitches untill the last stitch.
3 Single Crochets in the last stitch.
Slip stitch on top of the 1st Single Crochet.


Round 2:-
Chain 1(Not Counted as a stitch. Start the next stitch in the same stitch)
2 Single Crochets in each stitch around.
Slip stitch on top of the first Single Crochet.


Round 3:-
Chain 1(Not Counted as a stitch. Start the next stitch in the same stitch)
1 Single Crochet in each stitch around.
Do not make a slip stitch at the end. We will be working in continuous rounds.


Round 4 to Round 8:-
1 Single Crochet in each stitch around.
Remember to work in continuous rounds.
At the end of Round 8 , make a slip stitch on top of the first Single Crochet.(do not weave off)


Turn both Part-1 and Part-2 inside out.
Join One Side of Part -1 to One Side of Part-2 with Slip Stitches.


Chain 10 and Make a Slip Stitch into the bottom stitch and weave off.


Part 1:-
Round 1:-
Start with a slip knot.
Ch 6.
1 SC in the 2nd Ch from the hook.
1 SC each in the remaining Sts untill the last stitch.
3 SCs in the last stitch.
Turn your work and start working on the opposite side.
1 SC each in the remaining Sts untill the last stitch.
3 SCs in the last stitch.
SL on top of the 1st SC.
Round 2:-
Ch 1(Not Counted as a stitch. Start the next stitch in the same stitch)
2 SCs in each stitch around.
SL on top of the first SC.
Round 3:-
Ch 1(Not Counted as a stitch. Start the next stitch in the same stitch)
1 SC in each stitch around.
Do not make a SL at the end. We will be working in continuous rounds.
Round 4 to Round 8:-
1 SC in each stitch around.
Remember to work in continuous rounds.
At the end of Round 8 , make a SL on top of the first SC and weave off.
Part 2:-
Round 1:-
Start with a slip knot.
Ch 5.
1 SC in the 2nd Ch from the hook.
1 SC each in the remaining Sts untill the last stitch.
3 SCs in the last stitch.
Turn your work and start working on the opposite side.
1 SC each in the remaining Sts untill the last stitch.
3 SCs in the last stitch.
SL on top of the 1st SC.
Round 2:-
Ch 1(Not Counted as a stitch. Start the next stitch in the same stitch)
2 SCs in each stitch around.
SL on top of the first SC.
Round 3:-
Ch 1(Not Counted as a stitch. Start the next stitch in the same stitch)
1 SC in each stitch around.
Do not make a SL at the end. We will be working in continuous rounds.
Round 4 to Round 8:-
1 SC in each stitch around.
Remember to work in continuous rounds.
At the end of Round 8 , make a SL on top of the first SC.(do not weave off)
Joining:-
Turn both Part-1 and Part-2 inside out.
Join One Side of Part -1 to One Side of Part-2 with Slip Sts.
Hanging Loop:-
Ch 10 and Make a SL into the bottom stitch and weave off.
*********


.png)
These crochet pinch mitts are a great idea! Thank you for linking up at our weekly Link Party! You are being featured at our Wednesday Party #467 this week. Here’s the direct link to the post in case you’d like to share your feature (the link will be live on Wednesday):
ReplyDeletehttps://oombawkadesigncrochet.com/little-granny-bags-pinch-mitts-basket-case-potholder-link-party-467/ Hope to see you again next week! Rhondda
Thank You so much 😊🥰🥰🥰
DeleteThese are great: thanks for posting :-)
ReplyDeleteHave a funtastic week!
Thank You so much🤗😊
DeleteCan this be made thicker? Do you recommend using the double stitch ( insert the hook through the back loop and the loop from the previous row) to make the oven mitt thicker?
ReplyDeleteyes...definitely you can make it thicker the way u mentioned...... and u can also use double strands of yarn .
Delete