
Crochet Three Rows At a Time...!!! That's sounds interesting right..!!! Crocheting more than a row at once definitely makes the crochet project quick and faster to whip up. There are many ways to crochet more than one row at once using Double Crochets and Single Crochets. Its a interesting way which build up taller and quicker stitches.
Today am sharing the tutorial on How To Crochet Blanket With Three Rows At A Time. The technique looks similar to Tunisian Crochet where you are using a single hook, but you are keeping all the stitches on hook, and then gradually pull the loops. Unlike the Tunisian Crochet, the Crochet Three Rows at Once involves working in horizontal way. This Blanket pattern works up very quickly. Its a fun way to use this technique for making this Crochet Blanket.
There is no specific multiple of stitches needed to start the Blanket. You can make it in any size you need by making the required number of Chains.
Materials Used:-
10 Ply Cotton Bulky Yarn
6 mm Crochet Hook
6 mm Crochet Hook
Size:-
40 inches- Customizable to any size
Here is the Video Tutorial:-
You can follow along with this tutorial video. Please be sure to subscribe too!
PIN it and Save for Later:-
Let's Start:-
Round 1:-
Start with a Slip Knot.
Chain 100.
This measures around 40 inches.
You can adjust the size of the blanket by altering these stitches according to your requirement.
Start with any number of Chains.


Round 2:-
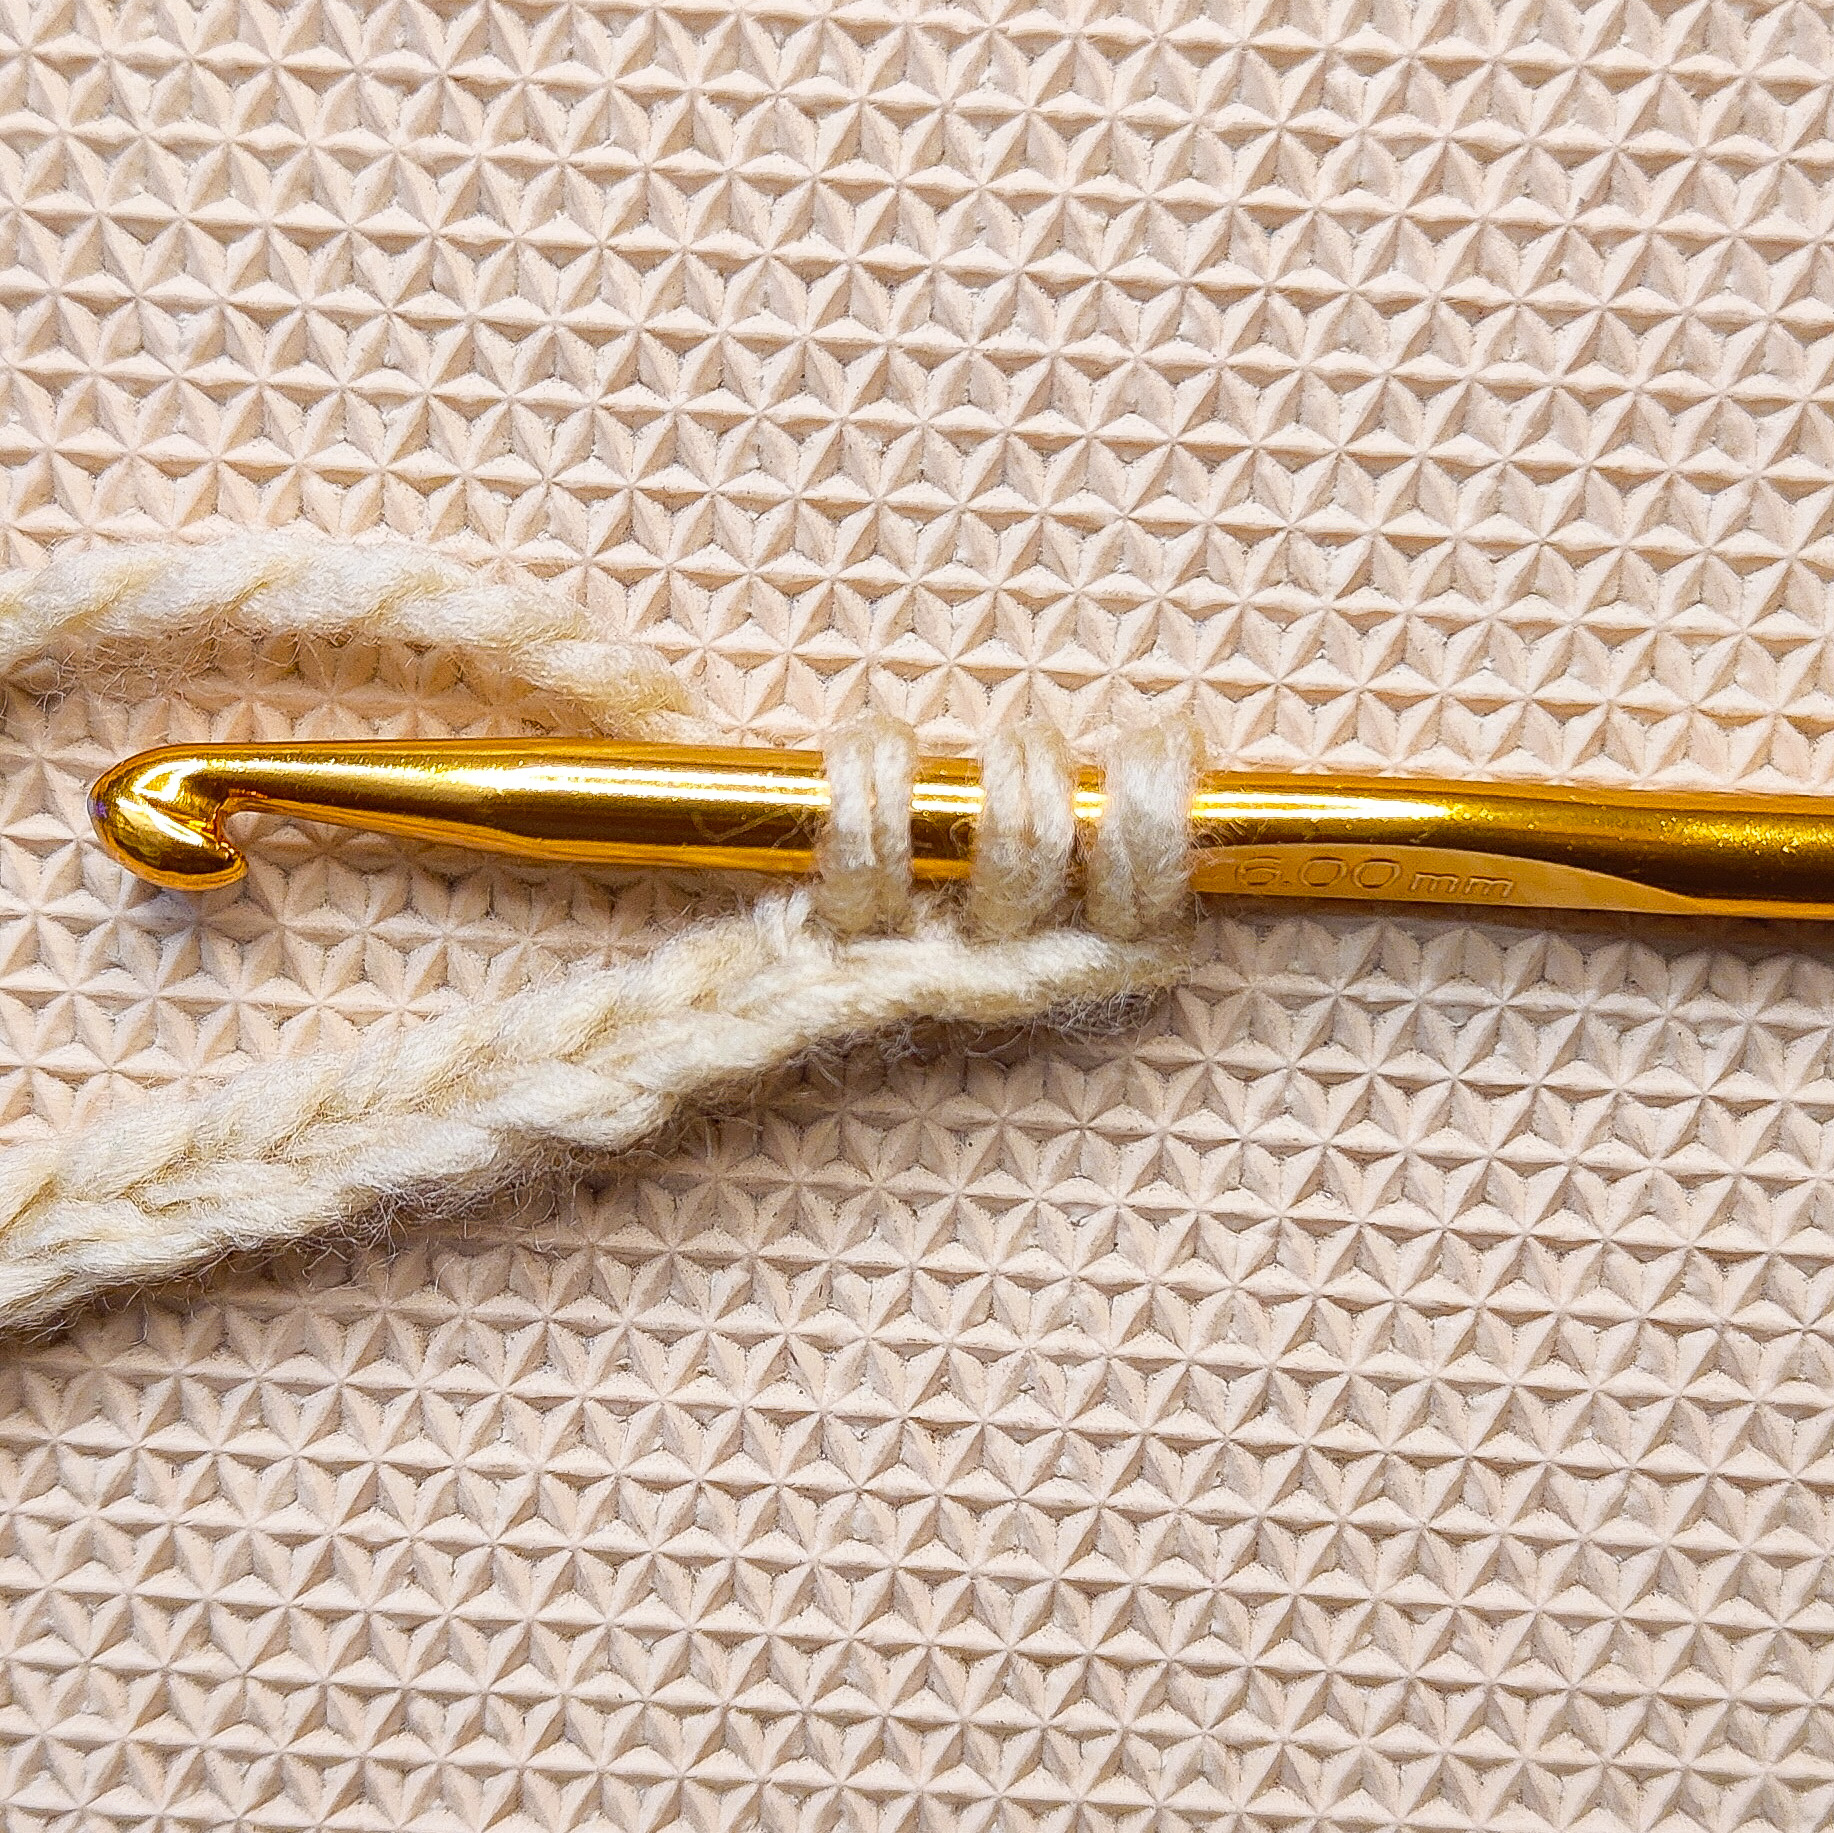
Insert your hook into 2nd chain from hook and Pull up a loop - 2 loops on the hook.
Insert your hook into the next stitch and Pull up a loop - 3 loops on the hook.
Insert your hook into the next stitch and Pull up a loop - 4 loops on the hook.
Yarn Over and Pull through 2 loops - 3 loops on the hook.
Yarn Over and Pull through 2 loops - 2 loops on the hook.
Finally , Yarn Over and Pull through the last 2 loops - this makes the first 3 Rows Stitch.
*To make the next stitch- Insert your hook into the slanting V- Stitch visible from the previous stitch made and Pull up a loop - 2 loops on the hook.
Insert your hook into the slanting V- Stitch just below the previous Slanting V- Stitch visible from the previous stitch made and Pull up a loop - 3 loops on the hook.
Insert your hook into the next stitch and Pull up a loop - 4 loops on the hook.
Yarn Over and Pull through 2 loops - 3 loops on the hook.
Yarn Over and Pull through 2 loops - 2 loops on the hook.
Finally , Yarn Over and Pull through the last 2 loops *
Repeat from * to * untill the end.
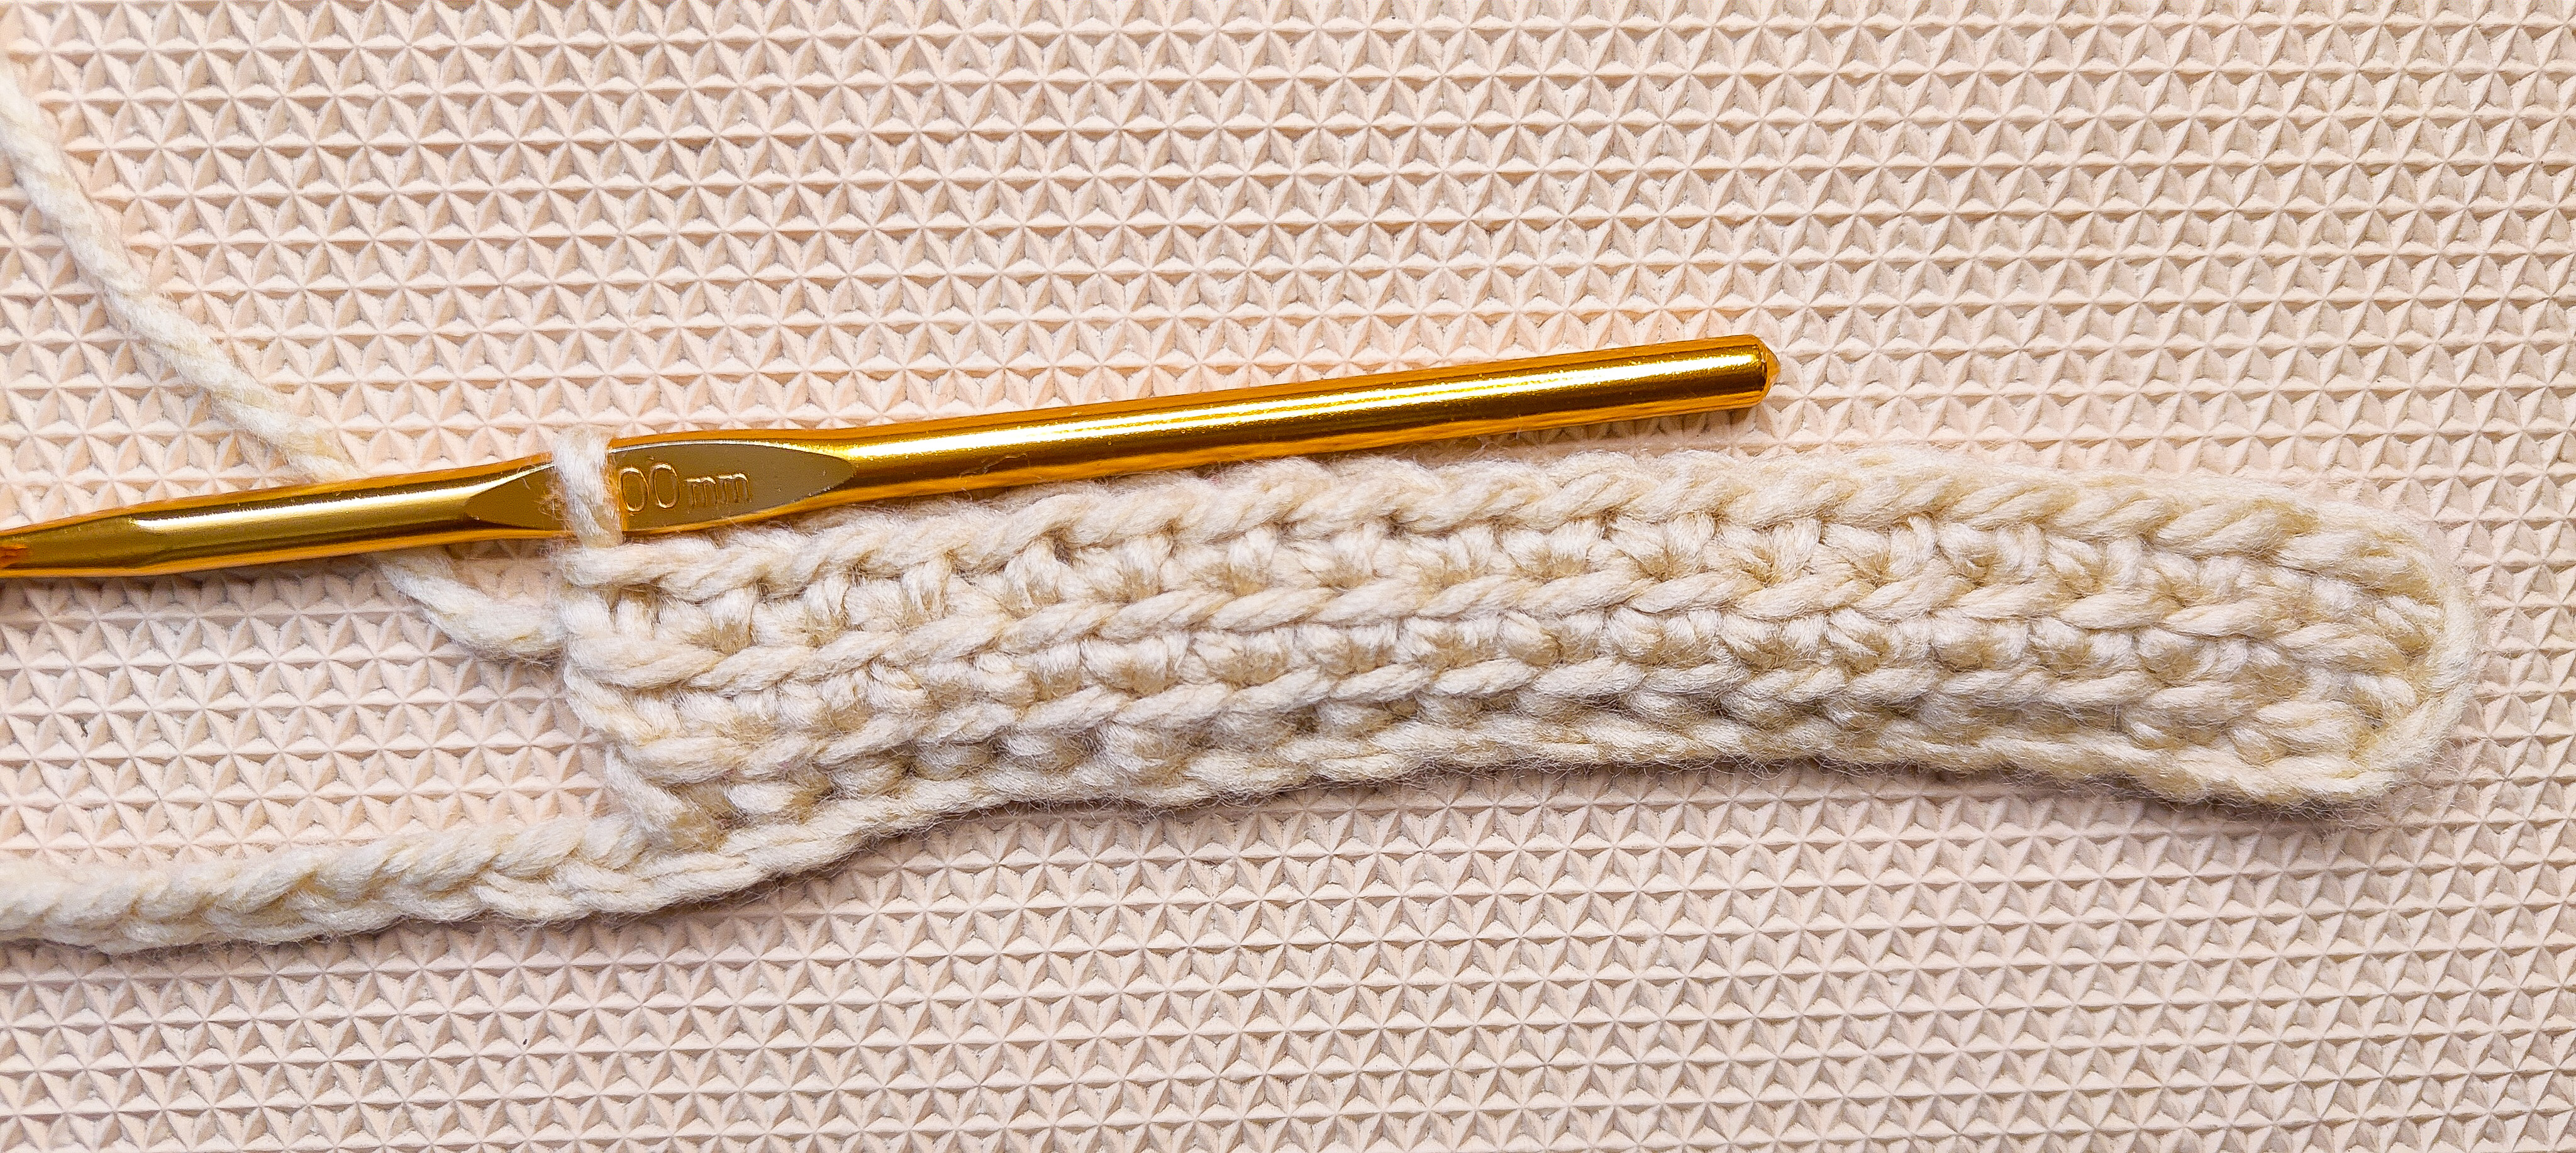
Once you reach the end, Chain 3 and turn your work.


Round 3:-
Insert your hook into 2nd chain from hook and Pull up a loop - 2 loops on the hook.
Insert your hook into the next stitch and Pull up a loop - 3 loops on the hook.
Insert your hook into the First Stich and pull up a loop- 4 loops on the hook.
Yarn Over and Pull through 2 loops - 3 loops on the hook.
Yarn Over and Pull through 2 loops - 2 loops on the hook.
Finally , Yarn Over and Pull through the last 2 loops - this makes the first 3 Rows Stitch.
*To make the next stitch- Insert your hook into the slanting V- Stitch visible from the previous stitch made and Pull up a loop - 2 loops on the hook.
Insert your hook into the slanting V- Stitch just below the previous Slanting V- Stitch visible from the previous stitch made and Pull up a loop - 3 loops on the hook.
Insert your hook into the next stitch and Pull up a loop - 4 loops on the hook.
Yarn Over and Pull through 2 loops - 3 loops on the hook.
Yarn Over and Pull through 2 loops - 2 loops on the hook.
Finally , Yarn Over and Pull through the last 2 loops *
Repeat from * to * untill the end.
Once you reach the end, Chain 3 and turn your work.


Round 4 Onwards:-
Keep repeating Round 3 untill the size needed and weave off.


Round 1:-
Start with a Slip Knot.
Ch 100.
This measures around 40 inches.
You can adjust the size of the blanket by altering these Sts according to your requirement.
Start with any number of Chs.
Round 2:-
Insert your hook into 2nd Ch from hook and Pull up a loop - 2 loops on the hook.
Insert your hook into the next St and Pull up a loop - 3 loops on the hook.
Insert your hook into the next St and Pull up a loop - 4 loops on the hook.
YO and Pull through 2 loops - 3 loops on the hook.
YO and Pull through 2 loops - 2 loops on the hook.
Finally , YO and Pull through the last 2 loops - this makes the first 3 Rows St.
*To make the next St- Insert your hook into the slanting V- St visible from the previous St made and Pull up a loop - 2 loops on the hook.
Insert your hook into the slanting V- St just below the previous Slanting V- St visible from the previous St made and Pull up a loop - 3 loops on the hook.
Insert your hook into the next St and Pull up a loop - 4 loops on the hook.
YO and Pull through 2 loops - 3 loops on the hook.
YO and Pull through 2 loops - 2 loops on the hook.
Finally , YO and Pull through the last 2 loops *
Repeat from * to * untill the end.
Once you reach the end, Ch 3 and turn your work.
Round 3:-
Insert your hook into 2nd Ch from hook and Pull up a loop - 2 loops on the hook.
Insert your hook into the next St and Pull up a loop - 3 loops on the hook.
Insert your hook into the First Stich and pull up a loop- 4 loops on the hook.
YO and Pull through 2 loops - 3 loops on the hook.
YO and Pull through 2 loops - 2 loops on the hook.
Finally , YO and Pull through the last 2 loops - this makes the first 3 Rows St.
*To make the next St- Insert your hook into the slanting V- St visible from the previous St made and Pull up a loop - 2 loops on the hook.
Insert your hook into the slanting V- St just below the previous Slanting V- St visible from the previous St made and Pull up a loop - 3 loops on the hook.
Insert your hook into the next St and Pull up a loop - 4 loops on the hook.
YO and Pull through 2 loops - 3 loops on the hook.
YO and Pull through 2 loops - 2 loops on the hook.
Finally , YO and Pull through the last 2 loops *
Repeat from * to * untill the end.
Once you reach the end, Ch 3 and turn your work.
Round 4 Onwards:-
Keep repeating Round 3 untill the size needed and weave off.
********


No comments:
Post a Comment
Thank you for taking time to stop by. I would love if you leave some inspiring comments about the post. To avoid spam , your comment will be verified and posted in sometime. Thank you!!!